MacrossJunkie
-
Posts
3260 -
Joined
-
Last visited
Content Type
Profiles
Forums
Events
Gallery
Everything posted by MacrossJunkie
-
They're all very good. Go with what design and color scheme you like the most. That said, if taking cost into consideration, the YF-29's are going to be harder to get and are selling at a much higher markup over MSRP. I didn't search around but I recall seeing the 25G and and 171EX under $200 while the YF-29's were in the 280 range or so at Nippon-Yassan.
-
Mine got shipped through some courier I've never heard of called Sagawa SGX and has been "On Board Aircraft" since the 14th. I picked the fastest shipping option that anime-export gave me. Has anyone in the US had stuff shipped to them via this courier before? I'm just trying to get a handle on when I should be expecting the package and also if they just hand off to the USPS like EMS does.
-
I'm on the east coast as well and FedEx tends to be faster too. EMS usually takes about 4-5 days since it seems to sit at customs for a day or so. FedEx is usually 3.
-
People spend that much or more on non-transforming models too, so I could see it being possible that the VF-4 might have enough appeal to attract the "purely aviation types." One of the things I like about Macross is that the designs of the fighter modes are such that for the most part, barring outlandish paint schemes, they could pass as real world fighters given that the inspiration for their designs tend to come from actual aircraft. So perhaps that particular quality could draw in others who are not normally into the transforming robots thing.
-
Hmm, yeah. It's still too hard for me to tell. Oh well. I guess we'll just have to wait for actual measurements or something. 15cm? That would make it only reach between the hips and chest area of a 1/60 VF-25.
-
Thanks. This is what happens when I don't visit the model kits section very often. I completely miss things like this.
-
Oh I wasn't speaking of the height of the RVF, only the size of the wings in comparison since they look huge compared to the vajra. Which is why I wondered how much closer to the foreground the RVF was. It's too bad there isn't a pic that shows more of the surrounding area so we could see the positioning of the valk.
-
That's some great work there. One question though. Why does the chest armor sit so low on the chest? That area looks a bit strange to me like that.
-
It does look pretty small using the RVF-25's wings as comparison. I'm not sure how much more in the foreground the RVF is compared to the vajra though. I may still get it if the price is right.
-
I had no idea those were going to be made. That's pretty cool. I hope some of the online retailers will make these available.
-
I got some time to work on my Quarter some more. I have most of the visible surfaces done. Not my best work, but I just want to finish it up at this point because it's so tedious and difficult trying to draw lines on this, especially where there are bumps and curves on the surface. I also took a break from the paneling and painted more detail on the miniatures using some gundam markers, which feels akin to painting a 1/48 plane model with a basketball. It seems some of the lines are a bit too subtle and hard to see under certain lighting. ARMD-R: BASTER-L: Edit: Added more storm attack mode pics with a little more work done on it.
-
Amazing work, Exo! The amount of detail on it really makes it look like it belongs with the 1/3000 SDF-1.
-
I like that blue valk group pic. I noticed from the exif data that your new camera is a D7000, right? Hope you're enjoying it. I love using mine.
-
I had ended up pre-ordering this from anime-export. I think by the time I decided to get it, HLJ was no longer taking any more orders. I don't normally pre-order from them because I don't like having to pay up front and then waiting for months before getting anything.
-
Or it could be thought of as a set of super parts. If only they had a price listed. It would be easier to tell.
-
That's a good question. If it's going through retail channels, it might actually be the valk+super parts. If it's a web exclusive, I'm guessing it may just be the super parts alone.
-
I'm guessing these super parts may not sell too well as many people are likely expecting a repeat of history where a renewal version is announced after the last set of accessories they can milk have been sold. Hopefully that doesn't indicate to them that there's no longer an interest in the VF-27 if that happens. The only way I'd be tempted to get these super parts is if it came with an AIF-9V Ghost.
-
I finally got a notice that my VE-1 is ready to be shipped so it looks like that Nov 13th date is more or less right. Looking forward to getting this. I really like the colors on this as it seems more realistic to me.
-
Such an awesome custom. The custom figures and swappable arm are an especially nice touch.
-
Looks like it's coming along pretty well.
-
I handle mine like I'm diffusing a nuclear bomb so mine look fine. That said, the only areas I tend to have trouble with and am extra careful with is the tip of the black stripe after the nose cone is folded down. It can end up scraping agast the bottom of the head base and scrape off some of the black paint. and the black borders around the "SMS" and "00#" on the shoulders scraping pulling them out or putting them back in for fighter mode.
-
Brera had them in the second movie. Edit: yeah, what Veef showed
-
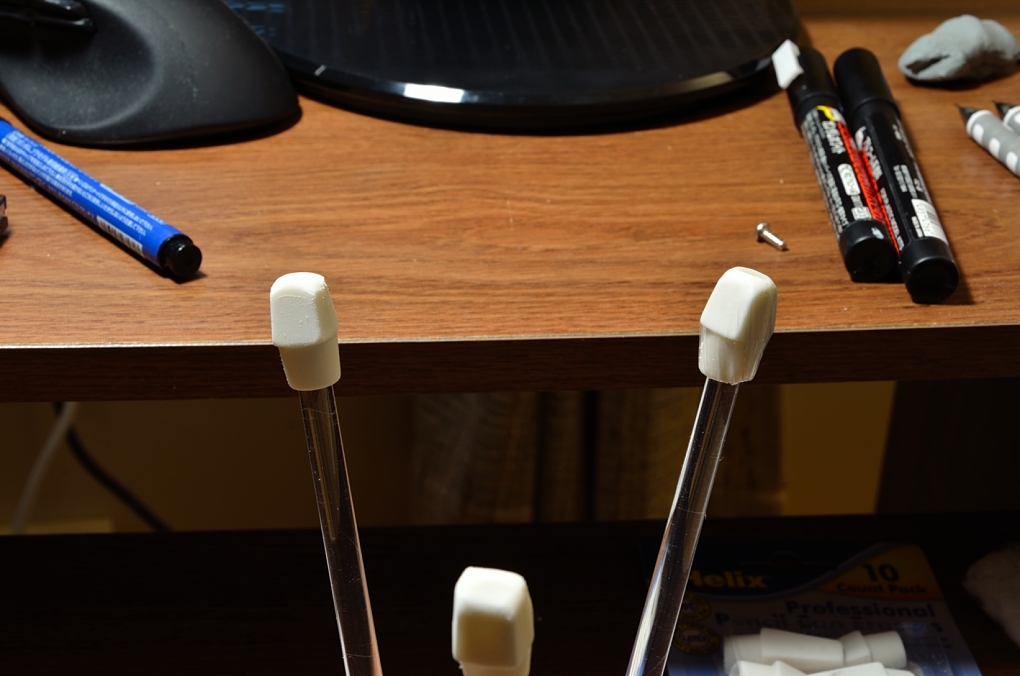
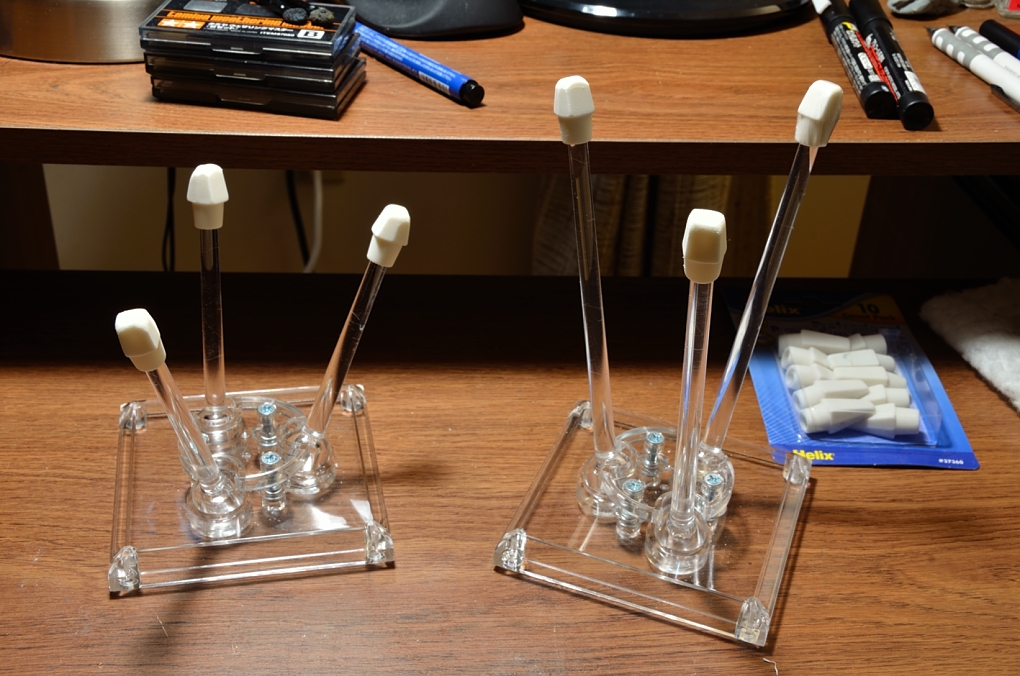
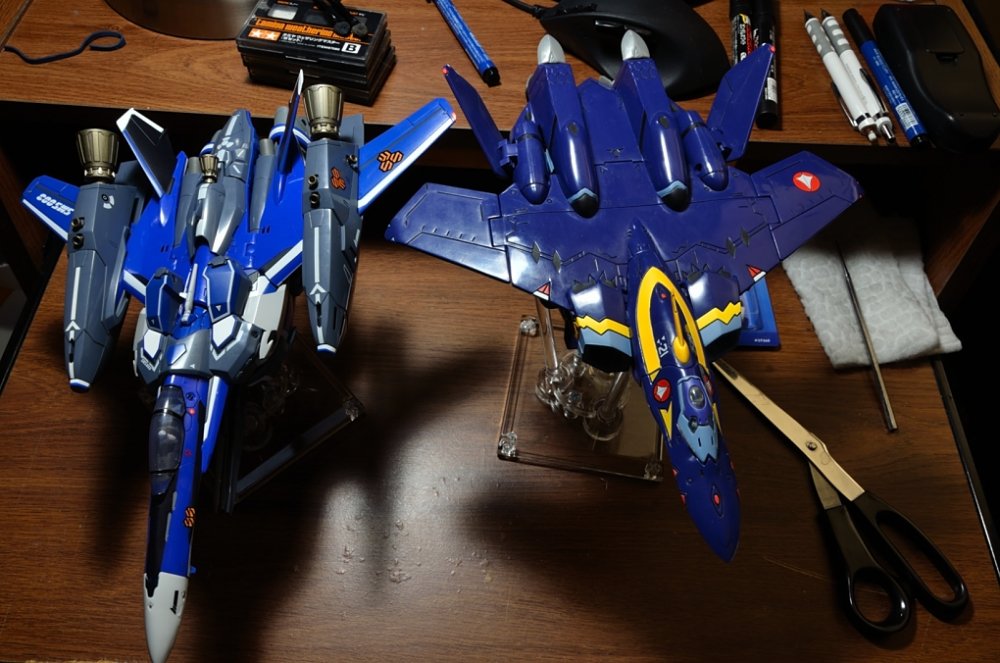
Alright, so the eraser caps I ordered arrived today. I ordered a couple packs of these from Amazon: It says it's pvc and latex free if that matters any. As it shows, it has 10 erasers so that's enough for 3 stands and 1 mistake. I popped one onto the stand to test the fit. It wasn't snug, but there wasn't a hug gap either. It should work in most cases. I went about modifying them by cutting the tip and rubbed the corners on a piece of paper to round them out. On one of the tips, I put plastic wrap over it and tucked it into the hole and pushed it onto the rod. This made the eraser much more snug. What I am going to test: I was originally going to clearcoat a toy and see if the eraser would react with it, but I felt that it would be more meaningful to a greater number of people if I just had it touching bare plastic and paint. I will use two stands for this test. One will hold a Bandai toy. The other will hold a Yamato toy. The Bandai test will be on the stand with all tips uncovered. At least one tip will be on bare plastic and at least one will be on a painted surface. The Yamato test will be on the stand with 2 tips uncovered and 1 tip with the plastic wrap. I want to see in the case where the erasers don't end up eatting through paint or plastic, if the plastic wrap itself might stick to the paint and not because of chemicals seeping through the original silicone tips. So this stand will have one uncovered tip on bare plastic, one uncovered tip on paint, and one covered tip on paint. Here are the two victi...err... volunteers. I'll put them on the stands and leave them for three weeks to see if there's even the slightest hint of smudging on the paint or plastic. I'll report back here in a few weeks and let everyone know if all this nipping of tips, and rubbing and finishing off will result in a happy ending.


-

A question about using Gundam Stands with Yamato Valkyries
MacrossJunkie replied to CoreyD's topic in The Workshop!
Do you think the adapter would be able to handle the weight of some of the heavier valk toys like the VF-17 and 19? -
Yamato 1:3000 SDF-1 Macross - unpainted model kit
MacrossJunkie replied to CF18's topic in The Workshop!
A question to those who have worked on or are working on this now. How the heck did you identify the screws? It could be because I'm a newbie at this, but I'm finding it near impossible to tell which screw is which letter in the assembly manual.kitt They just lump a whole bunch of them into several little baggies. The heads look nothing like the diagrams so all I've got are dimensions (which isn't easy trying to determine between a 1.5mm diameter and a 1.8mm diameter when the difference is so tiny). Update: Alright, so I was able to identify them through parting them out and using process of elimination. Some of them were confusing because they had the same measurements, had rounded heads, but the heads were of different thickness or the lengths were off by .1 or .2 mm. The most confusing were the screws labeled as "A". I had 18 of them in one bag. 2 in another bag that I'm still not sure they're "A" screws, but they don't fit any other description. However the thread pitch is different from the rest of the A's. So it seems I had the following: A x 18 (missing 2 unless those screws with different pitch will work) B x 16 (correct) C x 30 (missing 4) D x 8 (2 more than needed) E x 16 (10 more than needed >.<) F x 75 (missing G x 4 (correct) H x 5 (correct) I x 2 (correct) J x 6 (missing 2) K x 2 (correct) L x 4 (correct) M x 1 (correct) Honestly, they should be ashamed for screwing the pooch on the count of so many screws. Maybe if they had separated them properly, it would have made it easier for them to tell how many were packaged as well... Update 2: Good news is that HLJ is going to help me out and get the screws from Yamato for me. Once again showing that they are the best place for me to get Yamato items since they have always helped me in the past with no hassle.