MacrossJunkie
-
Posts
3234 -
Joined
-
Last visited
Content Type
Profiles
Forums
Events
Gallery
Everything posted by MacrossJunkie
-

Yamato 1:3000 SDF-1 Macross - unpainted model kit
MacrossJunkie replied to CF18's topic in The Workshop!
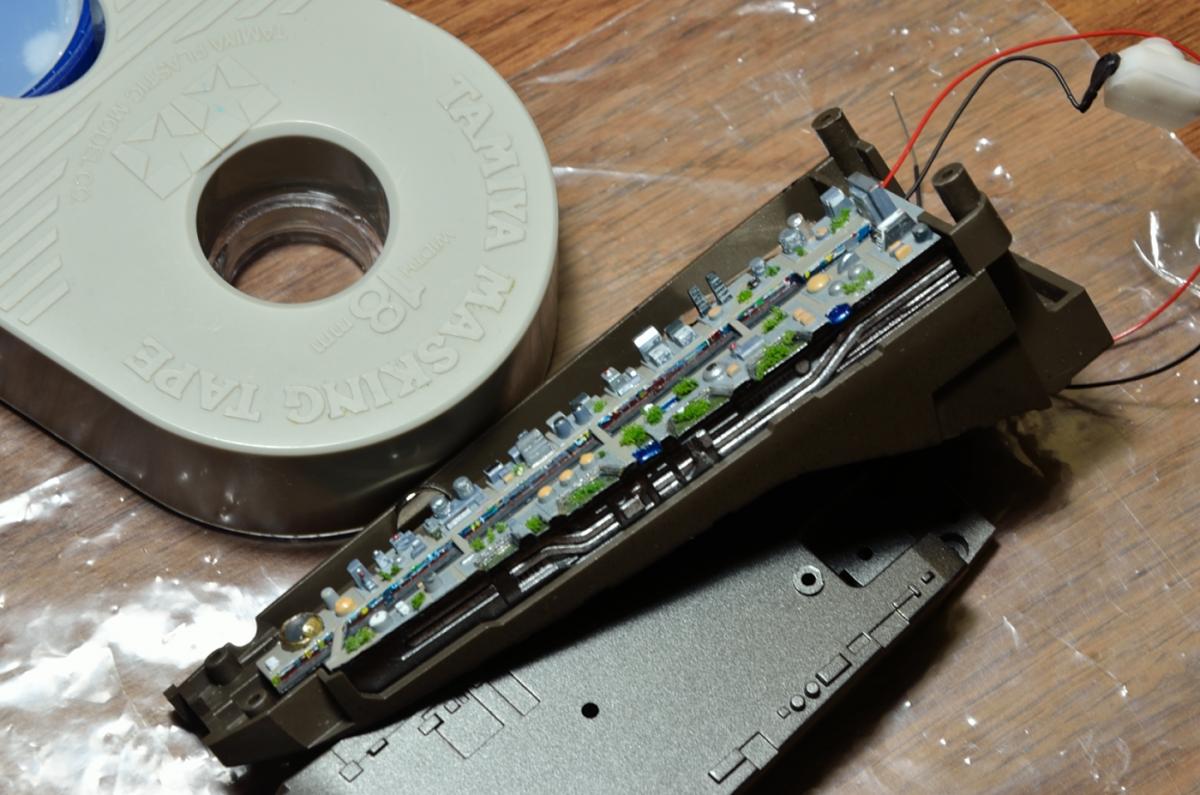
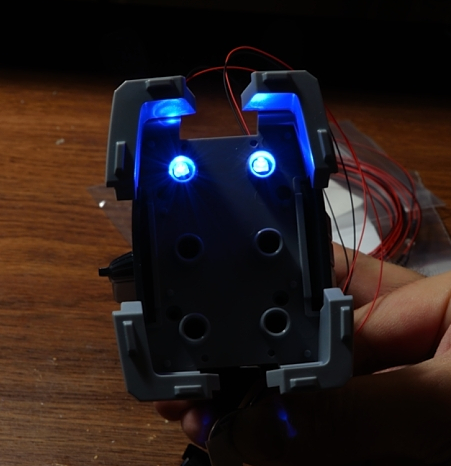
A quick update here. I modified the base plate and did the wiring for the LEDs and affixed them in place with some quake putty. I felt that was the best option. In case an LED burned out, I could just pull it out of the hole and replace it with another. So here's how it looks now with all the LEDs in place and powered up. I haven't put the engine nozzles on yet, but you can get a pretty good idea how it will look now. Between this and the glow-in-the-dark stickers I'll put on at the end, this thing should look pretty nice in the dark as well.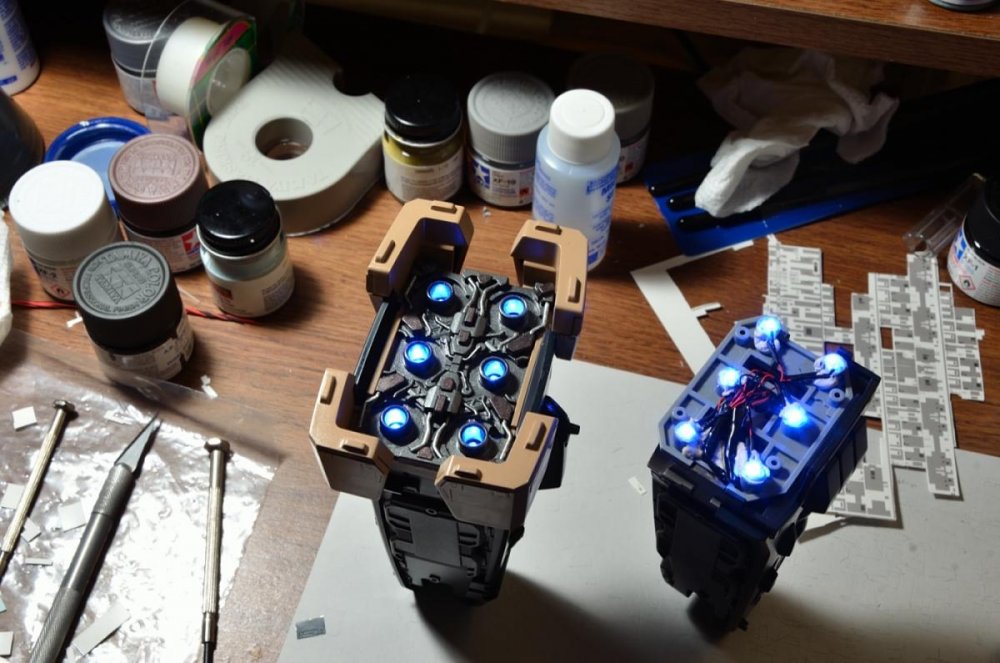

-
I try to do pre-orders also, but in the case of December 2012, I think Yamato is the one shooting itself in the foot. With the release of the very expensive VF-4, VF-19P, VF-17D, and VF-17 super packs all in the same month, I bet more than a few people had to pick and choose what they wanted most and decide to get the other ones later down the road. That's just too much all at once and that's not even counting having to buy gifts for other people as well.
-
Argh. I kept putting that 19F in my cart and then stopping myself from going through with the purchase last night and several times yesterday morning. With the super expensive VF-4, 171 armor pack, and buying gifts for people, I had to tell myself it wasn't a good idea. I am also tempted to get one of the unassembled VF-1 kits because I want to make a "Macross The First" paint schemed valk.
-
I've used the Tamiya lacquer based clear coat sprays on plastic and acrylic paint before and haven't had any problems with them melting or eating through the paint. Now I'm not saying you won't, just that I've never had a problem with it before I switched to using Future for my clear coats. I heard you can use the pastels with plain water mixed with dishwashing detergent if you want to try to avoid fumes from thinner and window cleaner. Never tried it so YMMV. You could try the oil wash thing as well. What I got was Martin/ F. Weber Odorless Turpenoid and Burnt Umber oil paint (Amazon links for illustrative purposes). After doing some research, this brand of turpenoid seems to be safe for model use where some other brands might mess up a Future clear coat or paint finish. From what I've seen in youtube videos and from articles talking about how to use oil washes, it seems to be very forgiving and easy to clean up.
-
Yamato 1:3000 SDF-1 Macross - unpainted model kit
MacrossJunkie replied to CF18's topic in The Workshop!
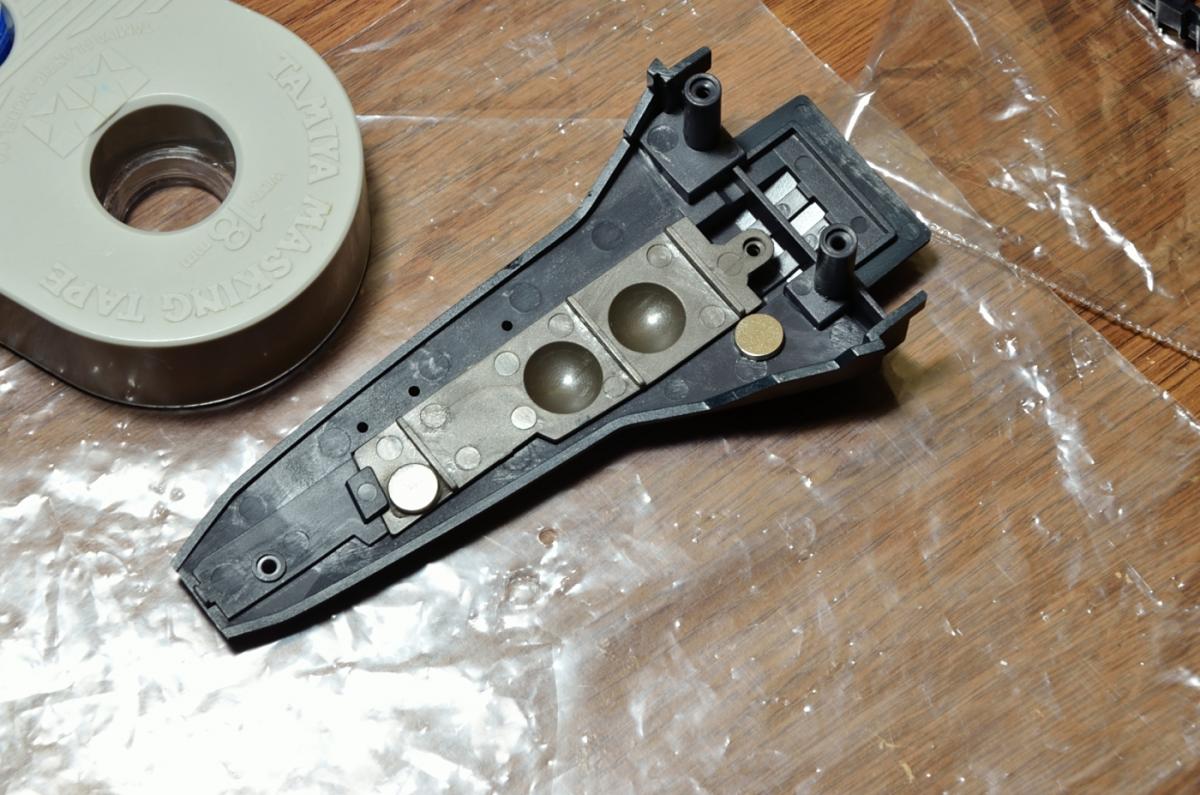
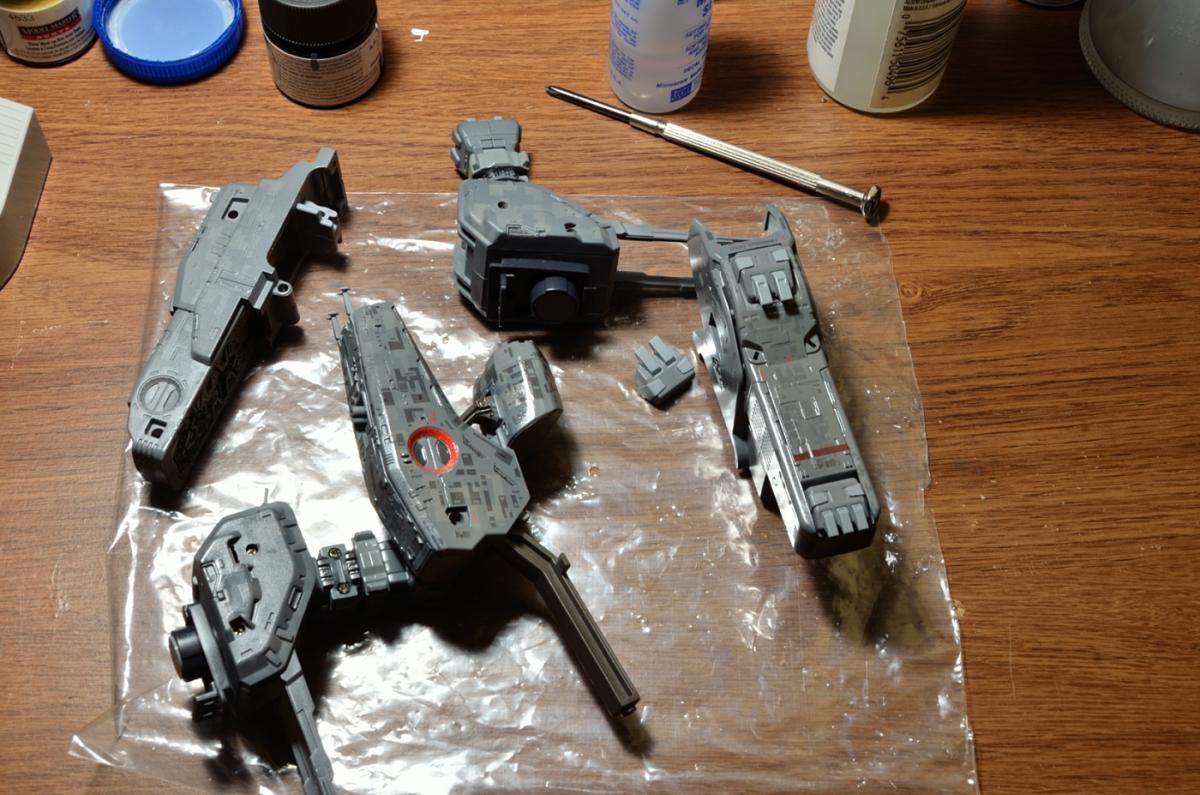
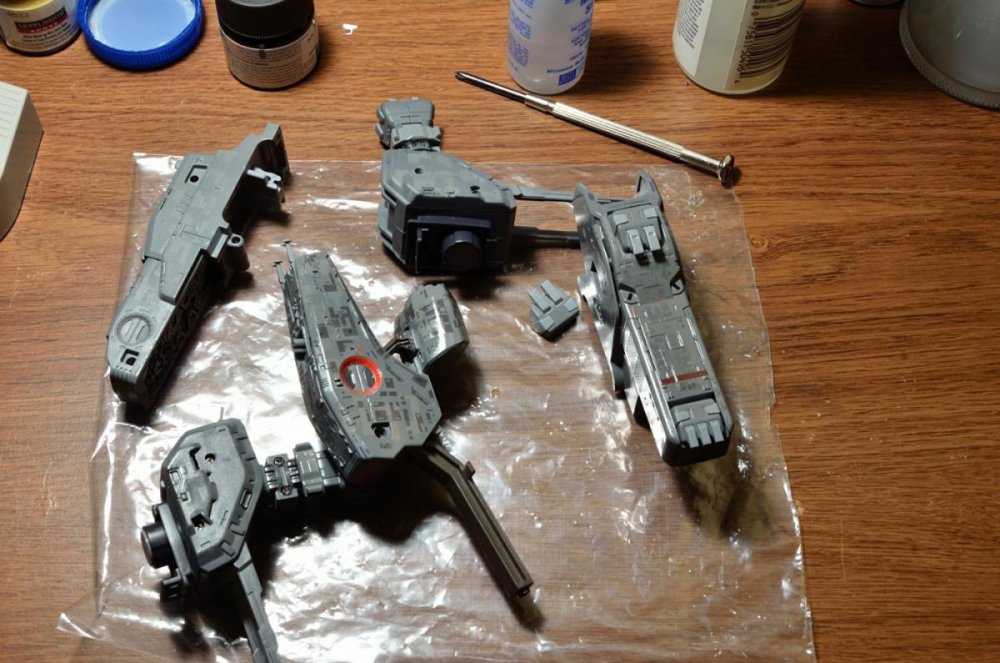
So here's the solution I went with. I cut "coin slots" into the sides of the legs. The side with no city was easy as I could just grind down the slot I needed right from the edge. The leg containing the city was more difficult. I had to cut the slot below the city. The inner wall was the more difficult part as I had to fit the grinding disc inside. In retrospect, it probably would have been smarter if I had practiced on other things before I started going at it with the brand new Dremel I got which I've never had any experience with whatsoever (or any rotary tool for that matter). It was more difficult than I had anticipated, but I got the job done. Slot cut lower than in other leg: The battery is below the city so it's not visible: I also added magnets so that I could just take the covers off without having to mess with screws and removing the caps. They seem to hold pretty well. If I have a magnet with 2lbs of force pulling on another identical magnet, does that mean I have 4 lbs of pulling force or do magnets not work like that? I also have started applying decals after putting together the major components. The red rings are a huuuuuuuuuuge pain to apply, but I'm a total newbie when it comes to waterslide decals as well. I honestly didn't think I'd be able to do it. I also got and started using the decal sheet that WMCheng used on his. I think those decals look great and was a stroke of genius. I made a filter, or whatever the terminology is for a coating to change the overall color tone, using the same dark sea gray diluted with Future to make it more transparent. Sprayed it over the section that holds to bridge to test if it I could coat the surface without overdoing it and completely hiding the decals. It seemed to work so I'll probably be using that on the rest of the SDF-1 as well.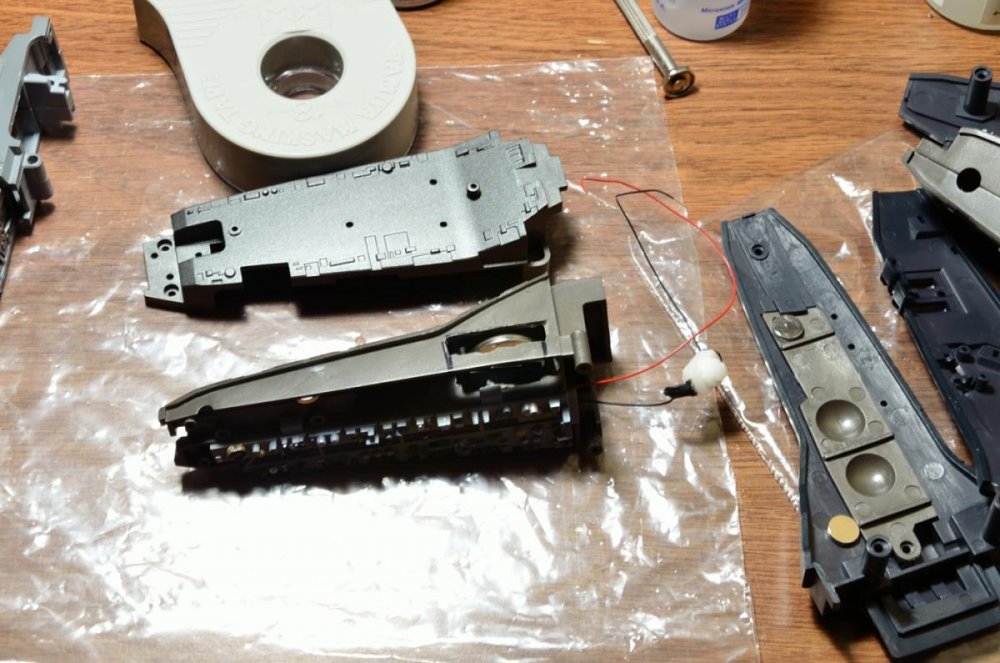


-
Using another acrylic to do panel washes on a model/toy coated in future is just asking for trouble. Future seems to react pretty easily when it comes in contact with another acrylic. When you need to wipe off the excess, it would either mix and bond with the Future and thus leave a stain or the Future coating will wipe up along with the wash if you try to wipe immediately. Panel lining bare plastic shouldn't be a problem assuming you can get it to work right. Personally, I've never been successful in getting an acrylic wash to work. I can never get it thin enough with a low enough surface tension to make it have that capillary effect so it just runs along the panel lines and such and it seems harder to clean up mistakes. Enamel + thinner seems to work best for me thus far, but I'm going to try an oil wash next. I recently bought some Turpenoid and burnt umber artist oil paint for my next wash so I'll see how that works out for me.
-
Well, I sent an email asking for clarification as well since I placed my pre-order before they had the message on the VF-4 page about updating the old price automatically. If they don't lower my price, I will definitely not be doing any more business with them since that would be a scam. I mean, the cost to them to get the items didn't change and if the dollar is worth more against the yen now then when it was invoiced, they are making additional money off people with the old price since they are effectively charging people more yen after the currency conversion if they refuse to charge the JPY equivalent in USD. Ugh, I have a migraine right now so I'm not sure if I was able properly convey my point. I can't think straight at the moment...
-
You could try this site, http://www.dv8cag.com/ I pulled that from Anubis' sig some weeks back and tried to get them to get me the custom paint set from Yamato. They couldn't help me with that because Japan's post won't mail things like paint, but I did notice that they have things set up so you could order from Amazon Japan and they would work as a proxy. The people I talked to regarding my request seemed pretty friendly and courteous too.
-
What I ended up doing was filing the tabs in the arms so that it formed more of a slope so that the arm attachments could be pulled off more easily. They still stay on just fine, but I don't need to worry about scratching up the finish or stressing the plastic trying to take it off.
-
Yamato 1:3000 SDF-1 Macross - unpainted model kit
MacrossJunkie replied to CF18's topic in The Workshop!
It turns out that the battery holder was larger than I thought. Neither method will work here I think. I have another location I think I can put it. I'm waiting for my dremel to arrive so I can do some cutting inside the leg and make a slot to insert the battery like a coin. Testing the lights to see how they look: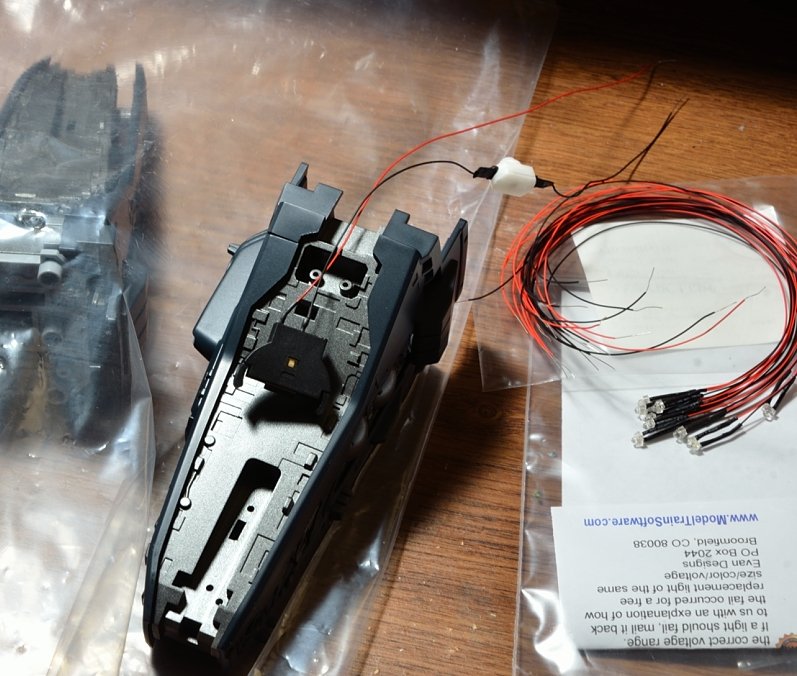

-
1/48+fp's, 1/60+fp's, 1/72, 1/2k, 1/3k,1/100 and now 1/144
MacrossJunkie replied to VF-18S Hornet's topic in Toys
You could maybe place and hold down the thin edge of a ruler down on top of the stickers to both put pressure on the stickers to keep them in place and also to ensure a straight cut. I find that for especially troublesome pieces that are both tiny and have curves or lots of angles, taking them off the sticker sheet and placing them on a blank spot on the sticker sheet helps since it gives a better hold. I then finish cutting the sticker and then peel it off and apply. I had already started cutting the sticker before then so I don't worry about taking the additional sticker layer off along with it since I didn't cut the entire shape of the sticker on top of it. The ones I hate most are the white "No Step" and other thin lined, tiny white markings because they are so hard to see the edges of while trimming, even against the light greenish backing. -
1/48+fp's, 1/60+fp's, 1/72, 1/2k, 1/3k,1/100 and now 1/144
MacrossJunkie replied to VF-18S Hornet's topic in Toys
I just trim every sticker with an xacto knife. Even the tiny little downward arrows on the left side of the cockpit below each pilot. As long as I make sure the surface is clean, the stickers stay fine. In the case of my Elint, I did the weathering first because if I screwed up and had to rub off paint, it would ruin the stickers. After I did the weathering, I put a gloss clear coat on top, then did the stickers, another coat of gloss, then lightly sprayed the stickers with the appropriate colors I used on the valk to tone the stickers down so they would match the weathering. What I do for trimming the "no step" stickers is I trim a row of them at a time. I run my knife down along the top edge, then the bottom edge, then finally the sides of each "no step". It helps keep them in place better so they aren't moving around as I cut, compared to cutting them in their entirety individually. I also keep a fingernail pressed on the sticker being cut to further help keep it in place. -
Yamato 1:3000 SDF-1 Macross - unpainted model kit
MacrossJunkie replied to CF18's topic in The Workshop!
I may try that if my original plan doesn't work out. I want to try to keep the cutting to a minimum if possible. How are you keeping the cover in place? Magnets as well? -
Yamato 1:3000 SDF-1 Macross - unpainted model kit
MacrossJunkie replied to CF18's topic in The Workshop!
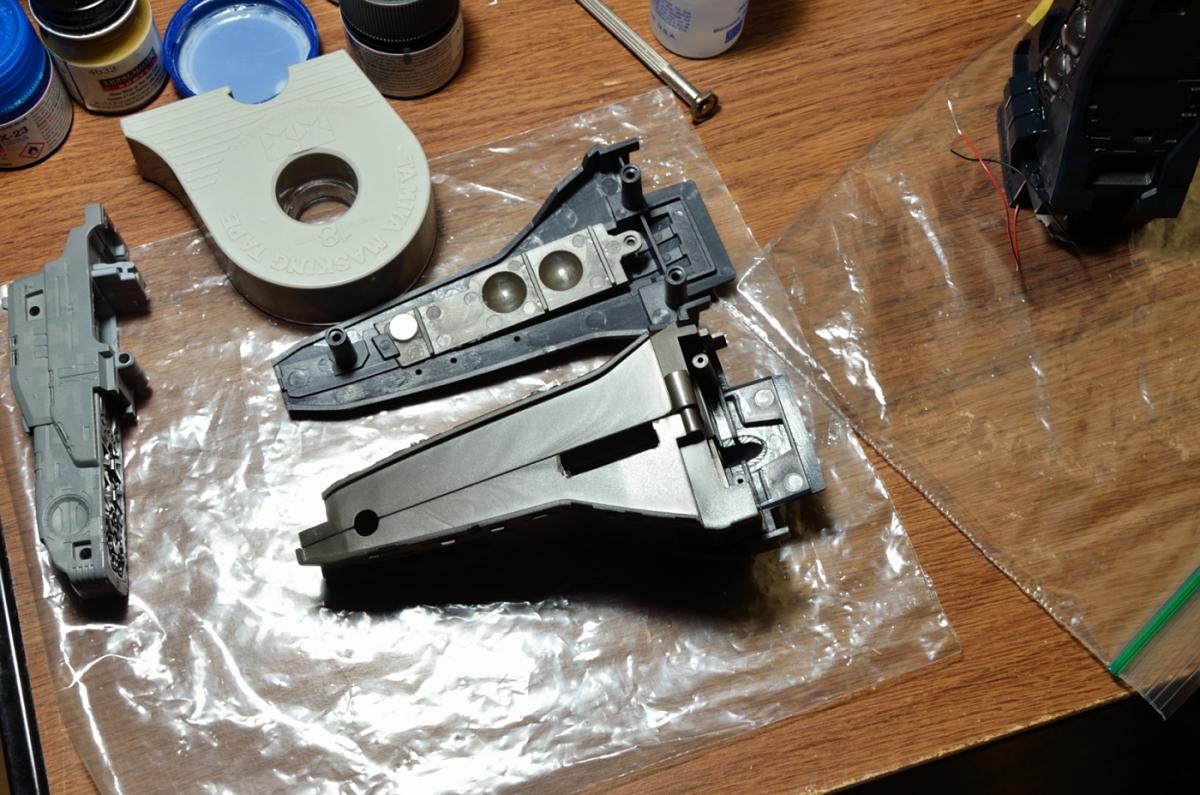
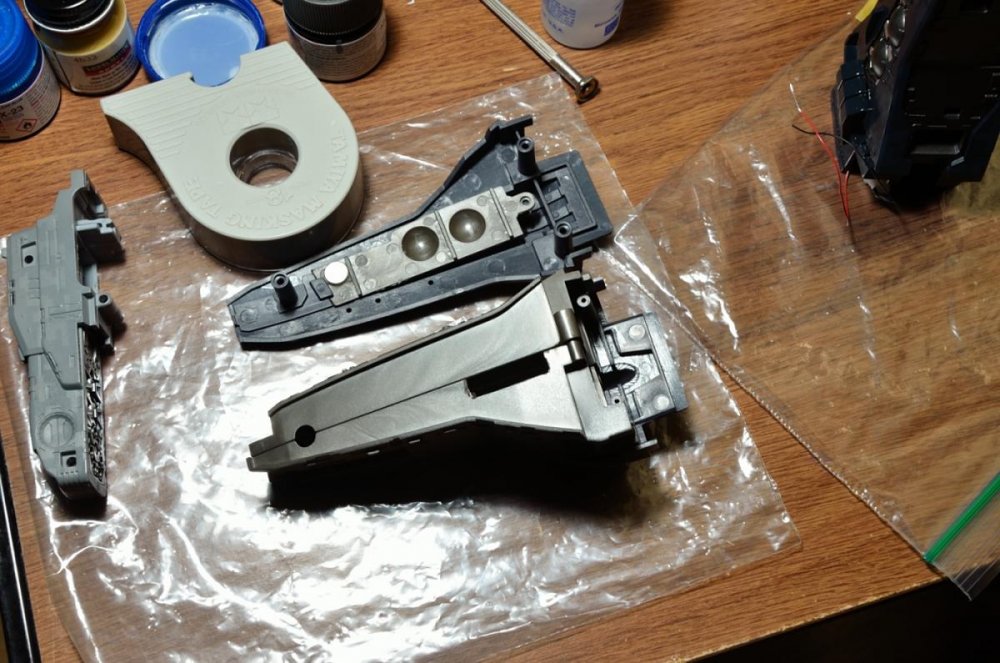
I'm starting to plan out what I'm going to do with mine. I have the decals, materials and tools I want to use now (I think). I'm going to try putting blue LEDs in each of the thrusters to simulate this: I found 1.8mm LEDs from this site, http://www.modeltrainsoftware.com, which I believe should be small enough to fit within the thruster wells. They also have switches and a 3V cell battery holders that should fit within the confines of the leg, hopefully. I fitted the right leg piece together to try to see how I might do it. The switch is just a push button type and I also would like to be able to get at the battery without too much difficulty which may be easier said than done. So far, I think I might be able to affix the battery holder on the inner side of the leg just underneath the domes, drill a hole and route the wires through and then out the bottom where I'll attach the LEDs and put the switch in the pit hidden by the thruster plate. I ordered some 5/16" x 1/16" neodymium disc magnets, with 2lbs of holding force, to use instead of screws to keep the sides of the leg and the "foot" in place so I can just pull them off to get at the battery and the switch. Well, that's the plan anyway. It may or may not work out. I'll have to wait 'til everything arrives so I can see if there actually is enough clearance. This is the first time I'm trying anything like this in addition to building out my first model from pieces cut off from sprue, so hopefully I don't royally screw this up.
-
Totally Scratch-Built 1/48 VF1-J Versión Tigrillo
MacrossJunkie replied to Tigrillo's topic in The Workshop!
That is an amazing scratch build. It's even more impressive that you were able to make it transformable as well. -
Bandai seems to often release stuff earlier in the month rather than at the last possible day like Yamato does.
-
That looks really good. Makes me wish I could afford to get two and display one in battroid mode as well.
-
1/48+fp's, 1/60+fp's, 1/72, 1/2k, 1/3k,1/100 and now 1/144
MacrossJunkie replied to VF-18S Hornet's topic in Toys
LOL -
1/48+fp's, 1/60+fp's, 1/72, 1/2k, 1/3k,1/100 and now 1/144
MacrossJunkie replied to VF-18S Hornet's topic in Toys
I got some time to take some GERWALK and battroid pics. -
1/48+fp's, 1/60+fp's, 1/72, 1/2k, 1/3k,1/100 and now 1/144
MacrossJunkie replied to VF-18S Hornet's topic in Toys
Fighter mode with FAST pack attachments. -
1/48+fp's, 1/60+fp's, 1/72, 1/2k, 1/3k,1/100 and now 1/144
MacrossJunkie replied to VF-18S Hornet's topic in Toys
I finished work on the VE-1 I got this past week. Changed things up a bit and decided to go with an airbrush for the weathering effects entirely instead of using the tamiya kits for this thing. It's been a while since I used an airbrush for it, but I think it came out rather nicely. It definitely lets me do more subtle effects than the tamiya kits allow. Somehow an antenna snapped off on the arm array. I have no idea when or how it happened, but I looked all over and couldn't find the piece to glue it back on. No FAST packs on right now. Giving the finish some time to dry and cure further before I attempt to put them on. -
Great job, Kurisama. I just got my VE-1 today and thought it was strange choice that it came with fixed pose hands that were meant for holding and supporting a gunpod despite the fact that it doesn't come with one nor is supposed to be equipped with one anyway. Yours would be far more useful. Overall, the VE-1 looks great. I'm pleased that Yamato managed to get a lot more tampo printing on this than any of the previous releases I've gotten thus far. Particularly on the legs.
-
Man, you guys are lucky. I was hoping to get mine by the weekend so I would have some time to do some work on it, but anime-export's shipping method just seems to be pretty slow even for the fastest shipping option they offered.
-
When I've flown from New York to Taiwan, the route taken is always to Alaska first. It has something to do with needing to stay within a certain distance from land rather than air currents or what not.
-
They're all very good. Go with what design and color scheme you like the most. That said, if taking cost into consideration, the YF-29's are going to be harder to get and are selling at a much higher markup over MSRP. I didn't search around but I recall seeing the 25G and and 171EX under $200 while the YF-29's were in the 280 range or so at Nippon-Yassan.