MacrossJunkie
-
Posts
3239 -
Joined
-
Last visited
Content Type
Profiles
Forums
Events
Gallery
Everything posted by MacrossJunkie
-
Wow, that person did a stunning job on that VF-0A build. I think I may gave picked up a few ideas/tricks just looking at those photos.
-
I wonder if they would have the same problem as BBTS and sell more pre-orders than actual stock that they'll get. That would especially suck since they require a 50% deposit. Also, what's up with them being based in California but costs $7 to ship within the US but only 5.50 to ship to other countries? That seems backwards and really cheap to ship internationally.
-

1/48+fp's, 1/60+fp's, 1/72, 1/2k, 1/3k,1/100 and now 1/144
MacrossJunkie replied to VF-18S Hornet's topic in Toys
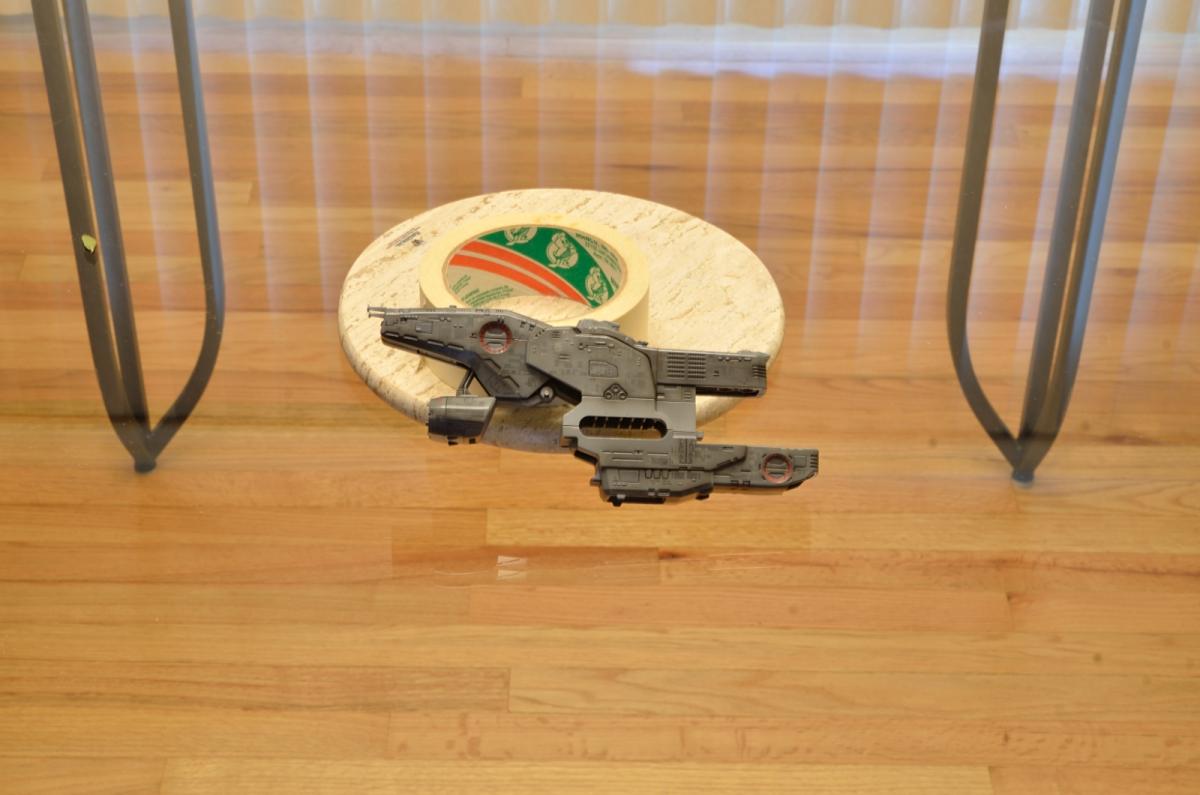
Thanks. It's in 1/3000 scale. New pics of cruiser mode added to my original post. -
Is there anyone whose v1 VF-25S didn't crack or crumble by now? I left mine alone and found that the chest hinge crumbled on its own in addition to the crack on the wing glove that formed not long after I had gotten it. The plastic they used for it is complete crap. Mine was the one that came with the armor, btw. Not the stand alone.
-
That is awesome. What does a smudge stick look like? I didn't think it was possible to get weathering to look that good using graphite from a pencil. I don't know if I want to do my VF-4G next or the armor parts for the VF-171EX. I just have my VF-4G panel lined and stickered for now. I feel a little burned out right now so I may just wait a week or so and then decide what I have the energy to work on next. Great job again!
-
1/48+fp's, 1/60+fp's, 1/72, 1/2k, 1/3k,1/100 and now 1/144
MacrossJunkie replied to VF-18S Hornet's topic in Toys
I didn't bother with LEDs in the city even though I could have. I would have had to re-route the wires back from the feet into the city section. Yep, the unassembled kit. -
Yamato 1:3000 SDF-1 Macross - unpainted model kit
MacrossJunkie replied to CF18's topic in The Workshop!
Well, I guess it's more or less finished. I put the finished pics in this thread. Here I still plan on finishing the alternate damaged parts and the PE valks + launch arms. Just going to take a break before I do those. -
1/48+fp's, 1/60+fp's, 1/72, 1/2k, 1/3k,1/100 and now 1/144
MacrossJunkie replied to VF-18S Hornet's topic in Toys
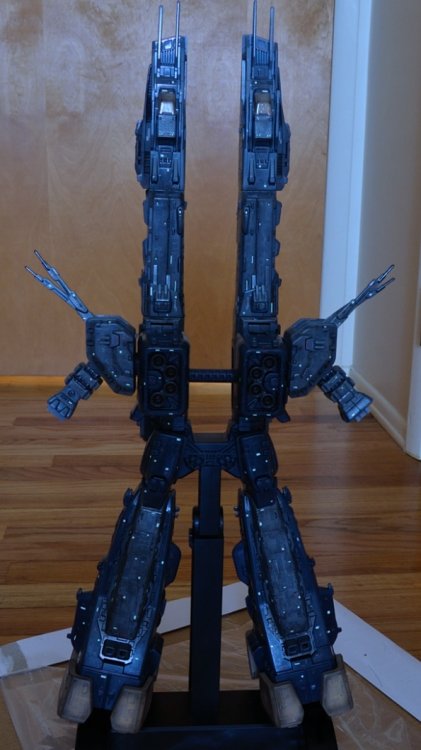
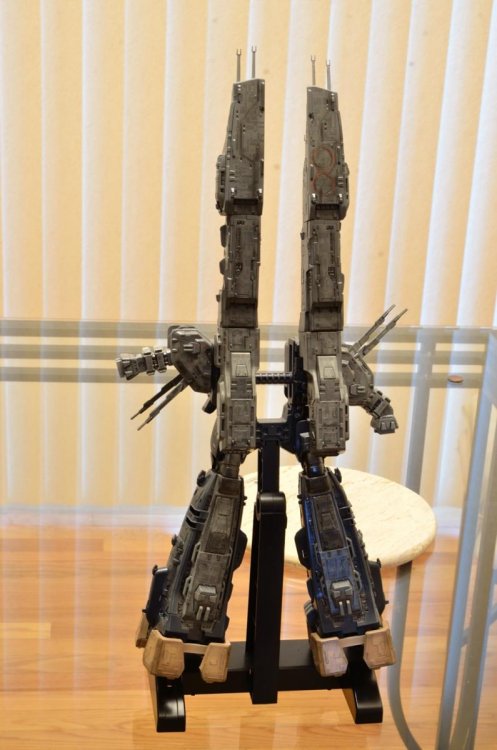
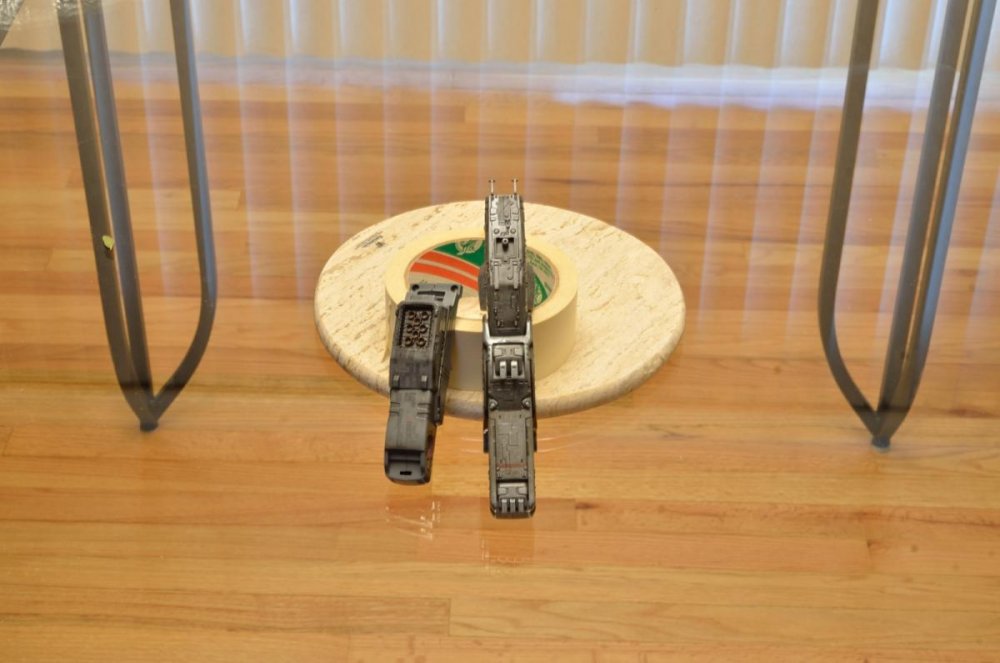
I finished up my SDF-1 after working on it nearly every day since the first week of December. I was going to take some non-"night" cruiser shots, but I accidentally knocked some of the photo-etch parts off so I'm waiting for glue to dry. Edit: Pics added for cruiser mode under normal lighting conditions instead of in the dark. I had some difficulty with the shots in the dark where the LEDs were causing lens flare. -
Yamato 1:3000 SDF-1 Macross - unpainted model kit
MacrossJunkie replied to CF18's topic in The Workshop!
*hides* Not me! I think I've already had my fill doing this one. I have already spent 3-6 hours a day, nearly every day over the span of 6 weeks and I need a break after this. This is so far the longest project I've ever tried to undertake and has been a mental struggle to keep at it. All the decals and stickers are what really killed me. -
Yamato 1:3000 SDF-1 Macross - unpainted model kit
MacrossJunkie replied to CF18's topic in The Workshop!
They're actually stickers applied like rub on transfers. However, the backing is very sticky and has a chance of taking the clear coat or decals with it. I just cut out smaller sections of 3 or 4 stickers and then peel the stickers off with tweezers and apply them individually. That's the safest bet, although a tad time consuming. They are easy to break as well as they are a thin yet solid layer of phosphorus that can crack or chip if bent too much or too much pressure is applied. -
Yamato 1:3000 SDF-1 Macross - unpainted model kit
MacrossJunkie replied to CF18's topic in The Workshop!
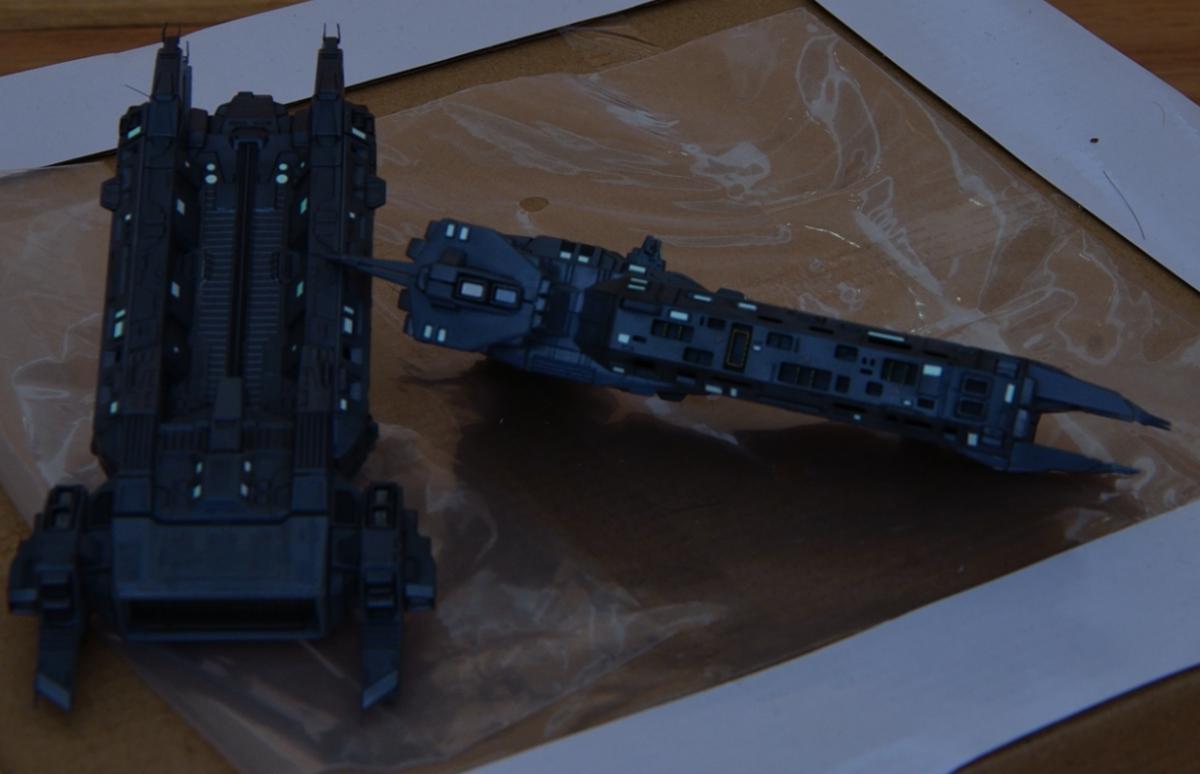
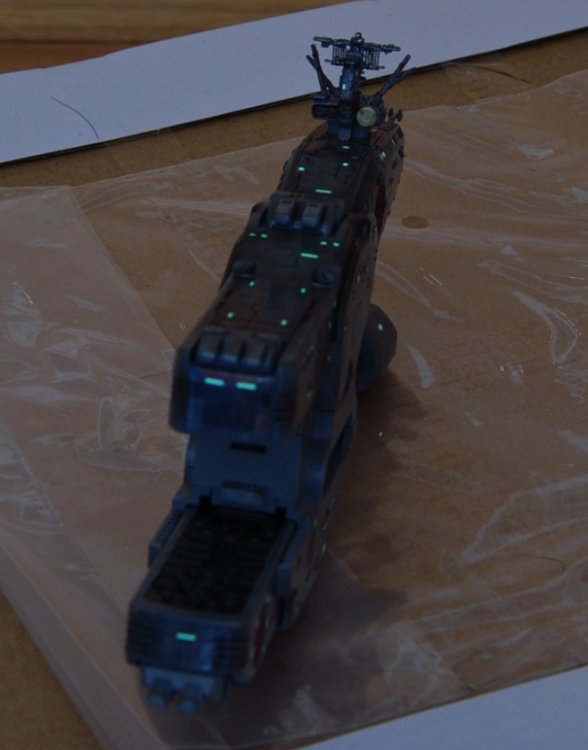
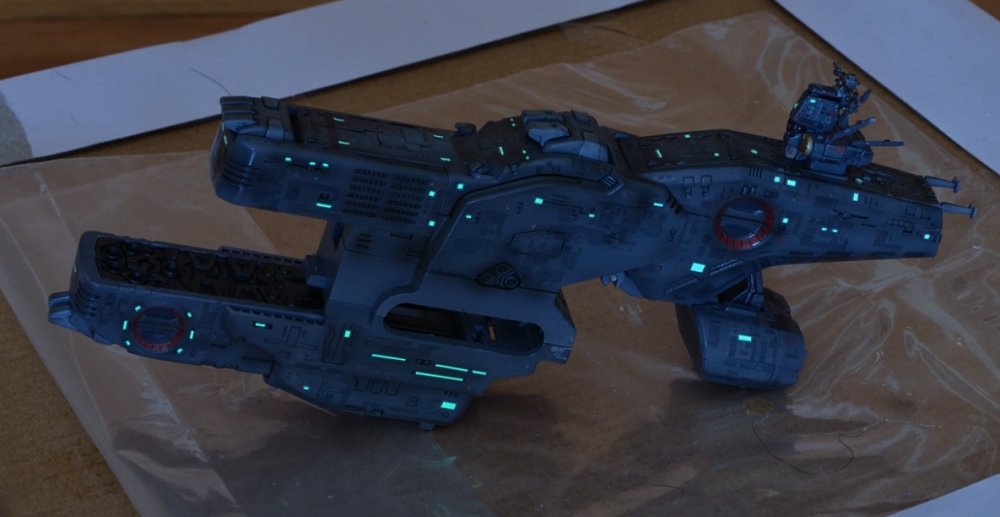
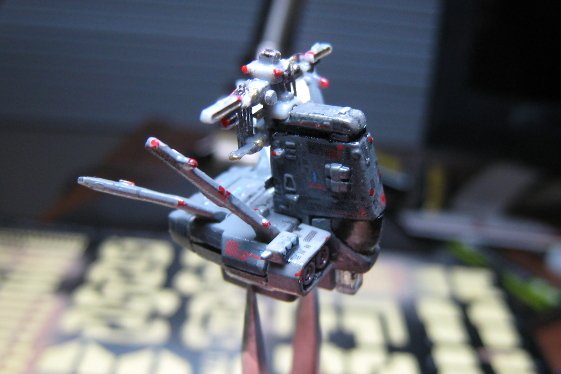
Here are some pics with glow-in-the-dark stickers applied. I'll do another once over and see what areas could use a few more, but for the most part, the sticker portion is done. Afterwards, I need to possibly give it another clear coat and then a flat coat, put it all together and add the windows to the legs, then do final detail painting. I might possibly draw some pencil lines like wm cheng did also.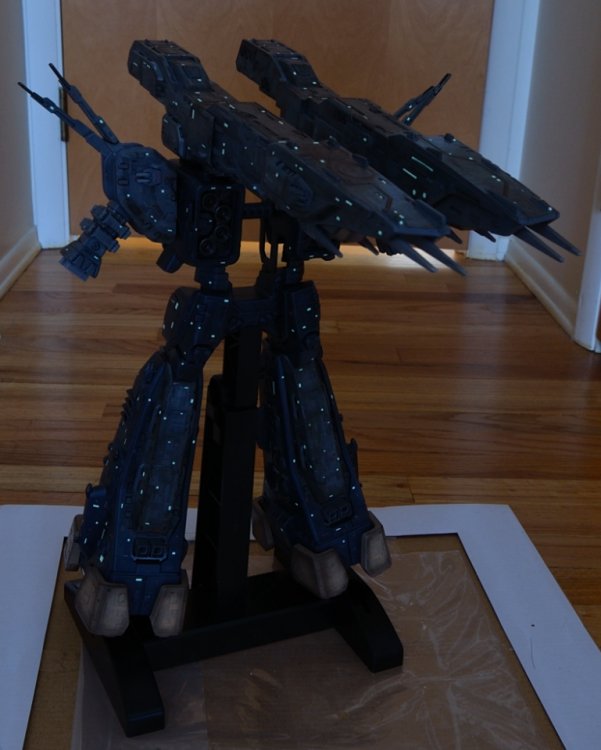


-
Yamato 1:3000 SDF-1 Macross - unpainted model kit
MacrossJunkie replied to CF18's topic in The Workshop!
Yeah, I wish I had something that could paint to that precision. Those are decals. Specifically the red version of the HIQ Parts 1/144 decal sheets first used by KyeKye, shown here. There were some decals with circles that were perfectly sized for this so I cut them out and used them on the view shield. Unfortunately by the time I decided to get some, Only the red and white versions were left in one online store. When I got it in the mail, they only sent me the red one and apparently the only white one they had remaining got lost somewhere so I only had the red decal sheet to work with and couldn't get a replacement. I've almost finished applying the glow in the dark stickers now. I'll get some pics up when I've some time. They were actually quite a pain to do and it took several hours a day over many days. When applying them the way the instructions showed, it actually ended up lifting off and ruining chunks of the clear coat "protected" decals I had underneath when I pulled the backing off. That really pissed me off. The backing is waaay too tacky I think. I've even broken some of the glow in the dark stickers trying to get them off because the backing was so sticky. I had to redo a few areas or tried to hide the blemishes as best I could. After that point, I just applied them my own way instead. -
Ah, I see. I only just got my armor parts for the 171 a couple days ago, but I haven't really examined or done anything with it yet since I've been working on other projects and wanted to complete them first. That's nice that they're still usable on Yamato valks at least.
-
Yamato 1/3000 SDF-1 modification and paint up...
MacrossJunkie replied to wm cheng's topic in The Workshop!
If it makes you feel any better, I keep knocking off the needle like photo-etch parts on mine several times a day while working on mine despite super gluing them. I'm near the point where I say screw it and rip them off. got a few scratches from them as well. Almost poked my eye with one also. That would not have felt good. As for the puttying, I gave up on that after the multiple times I've found there was a problem with a mechanism after I had already assembled and puttied painted and decaled/applied PE, only having to take them apart again and see if I could figure out a fix. I don't know why, but the toy version parts seems to be less flawed than the kit. I know I put it together correctly too, because sometimes the problem only occurs on one side like the left arm vs the right. Yours looks amazing regardless and I can only hope that mine looks half as good as yours when I'm finished. -
Yamato 1/3000 SDF-1 modification and paint up...
MacrossJunkie replied to wm cheng's topic in The Workshop!
Wow, good job. Man, that looks like a really severe pain in the butt to do. With my luck, I'll probably end up breaking the claws or something. I'm not sure how you managed to glue those tiny things together so the legs and boosters are perpendicular to the main body. There doesn't seem to be much surface area to work with for gluing. Beautiful! I didn't think the pencil lines would make much of a difference, but those shots changed my mind. It adds a nice subtle yet noticeable difference. I may have to try that with mine too. I only did the feet like that on mine so far because they just looked so plain otherwise. -
Yamato 1:3000 SDF-1 Macross - unpainted model kit
MacrossJunkie replied to CF18's topic in The Workshop!
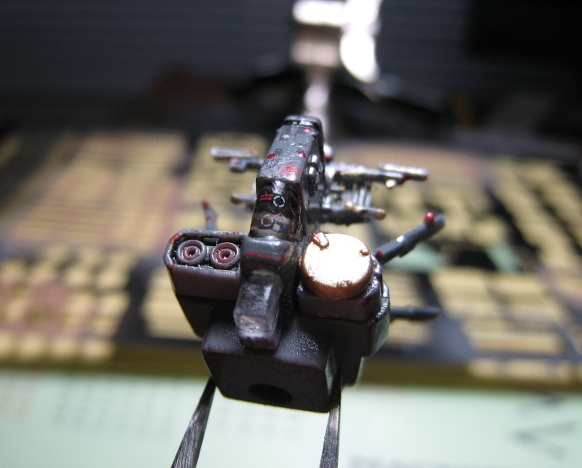
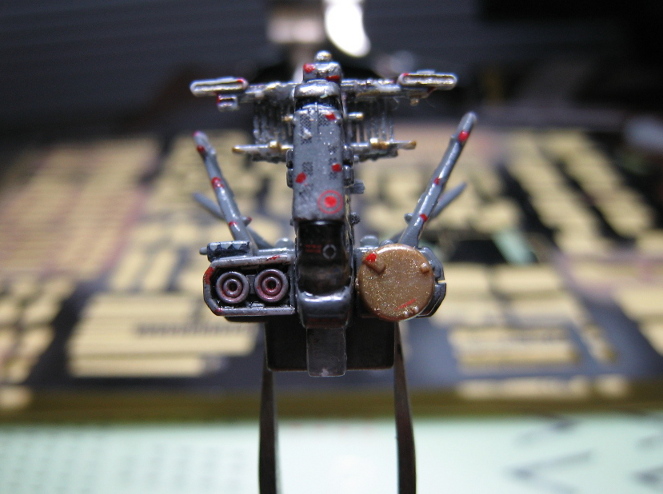
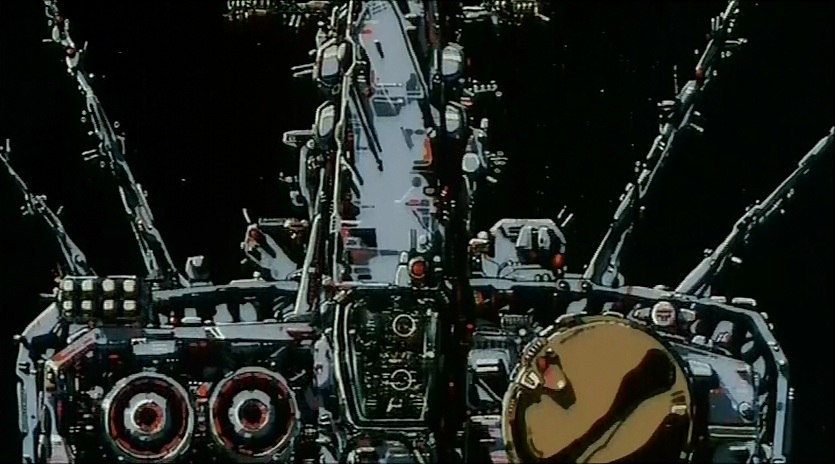
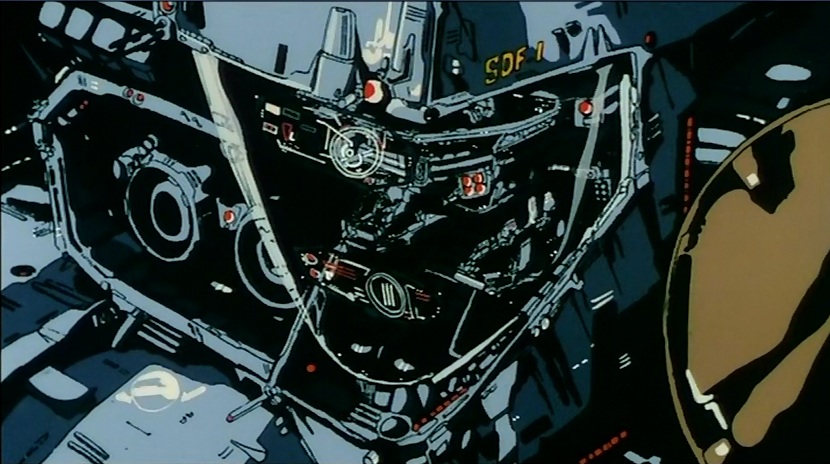
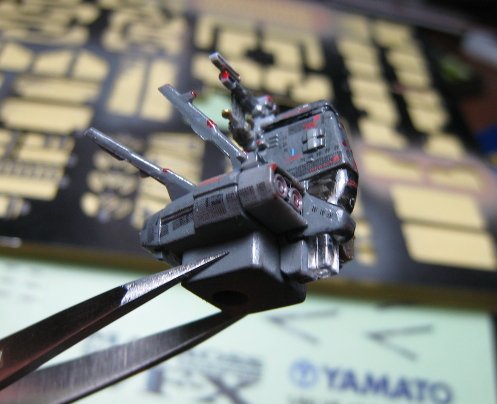
I spent some time last night putting together and detailing up the bridge section. I also put some decals on the bridge window to simulate the HUD like this: I think I still need to add a bit more paint before I do another clear coat and oil wash.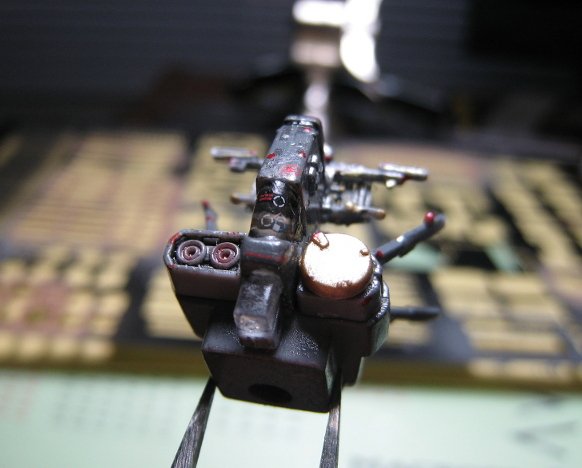


-
My main point of concern for a fully repainted custom would be the areas above the indentations on sides of the cockpit that help lock the top when you fold it down over the cockpit in battroid mode. There would be a lot of scraping there each time it's transformed.
-
That's certainly interesting. I thought the hardpoints for the 171 were a different size from what Yamato uses.
-
Aww, dangit. I missed it. I wasn't expecting HLJ to open up the pre-orders so soon. They usually take a week or more after everyone else.
-
I got mine form HLJ too, but didn't get any discount.
-
Yamato 1:3000 SDF-1 Macross - unpainted model kit
MacrossJunkie replied to CF18's topic in The Workshop!
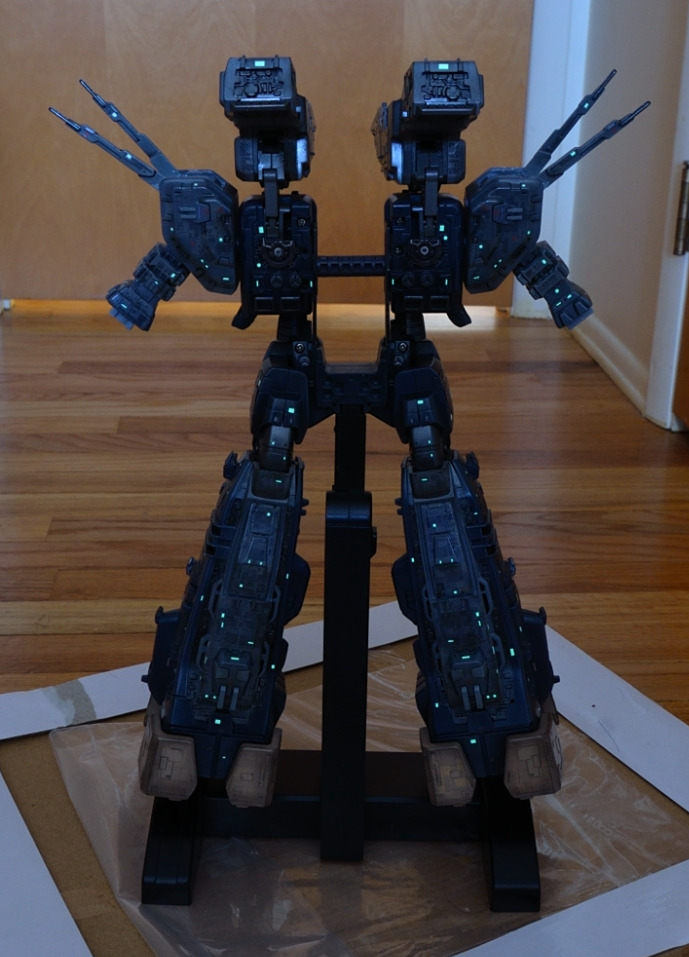
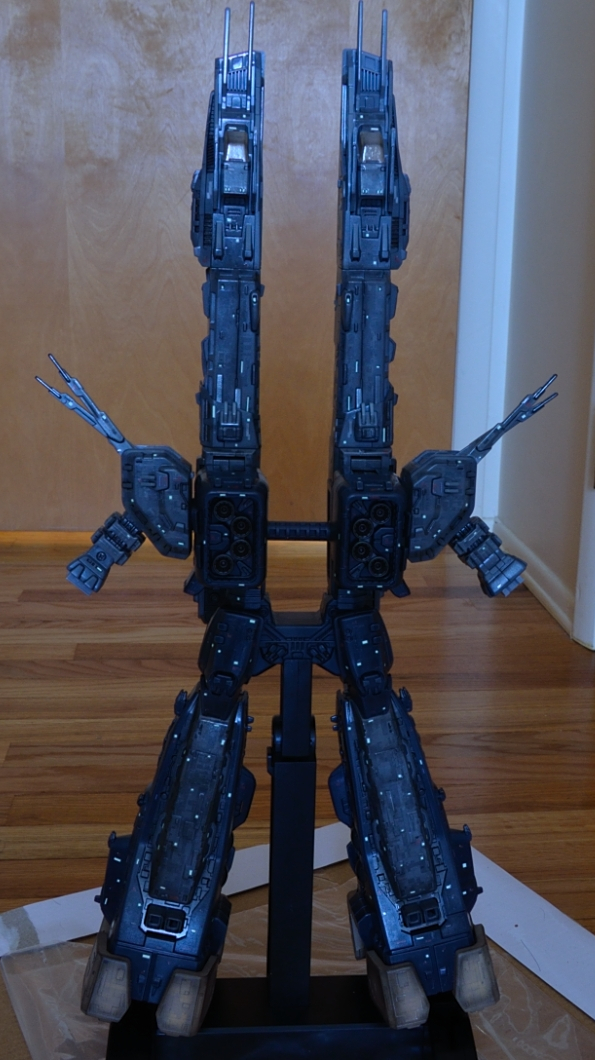
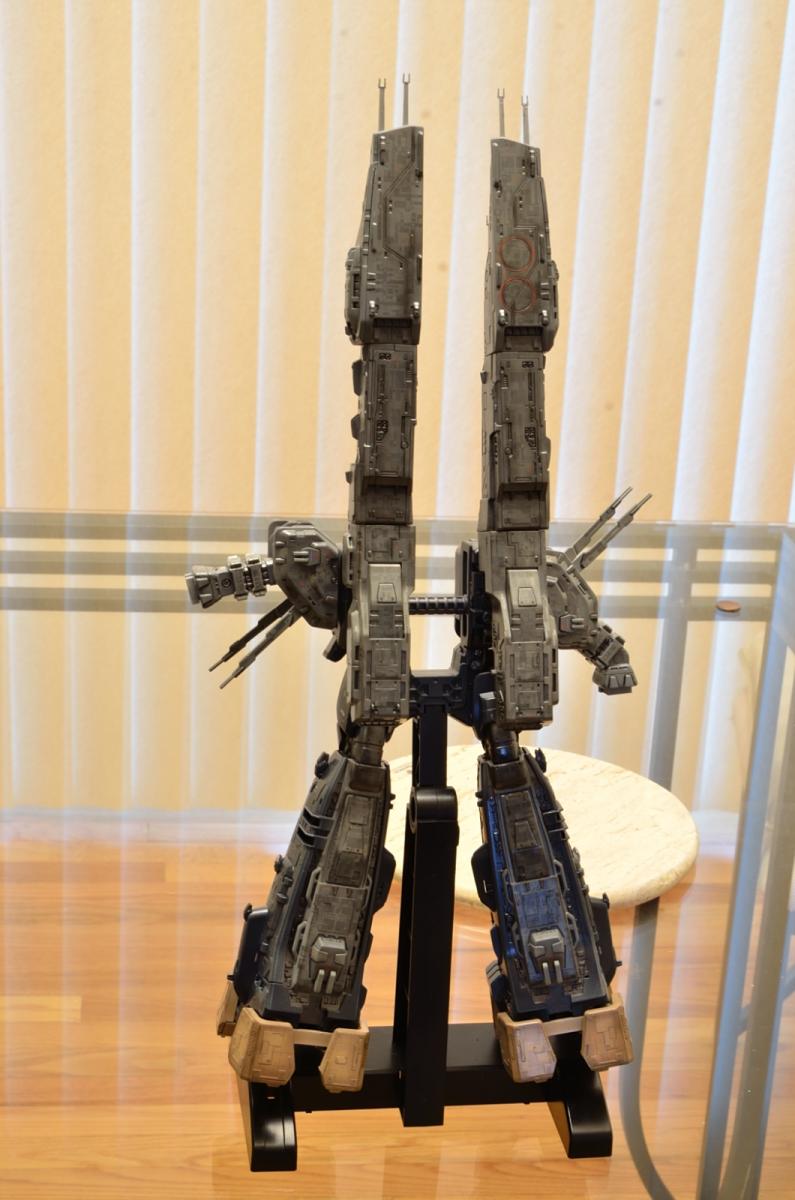
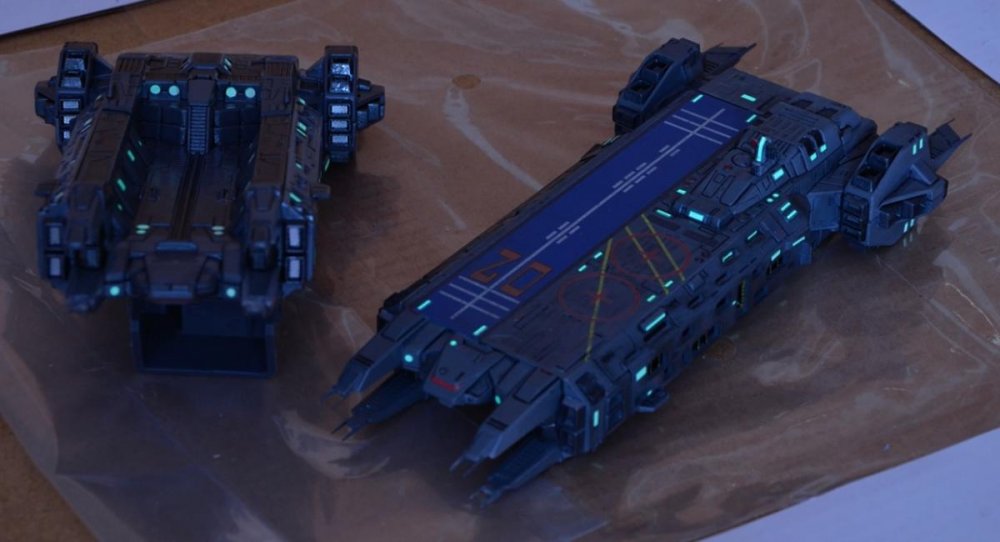
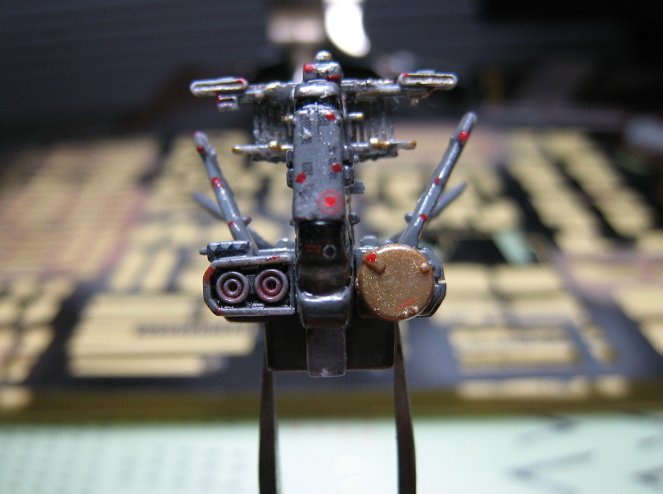
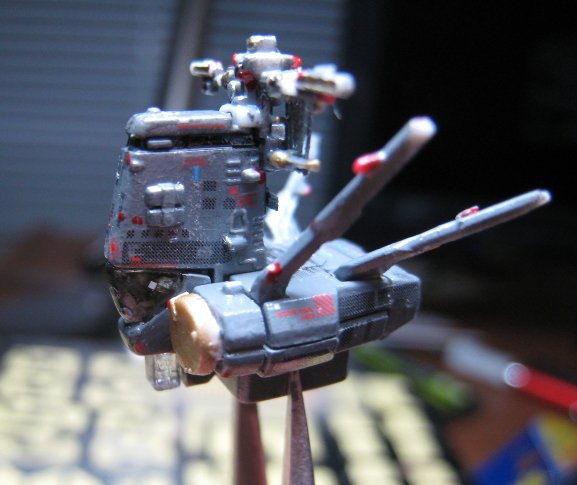
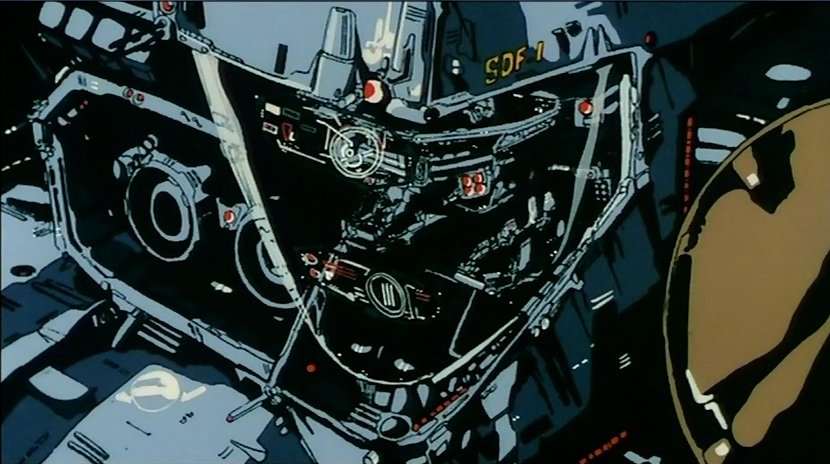
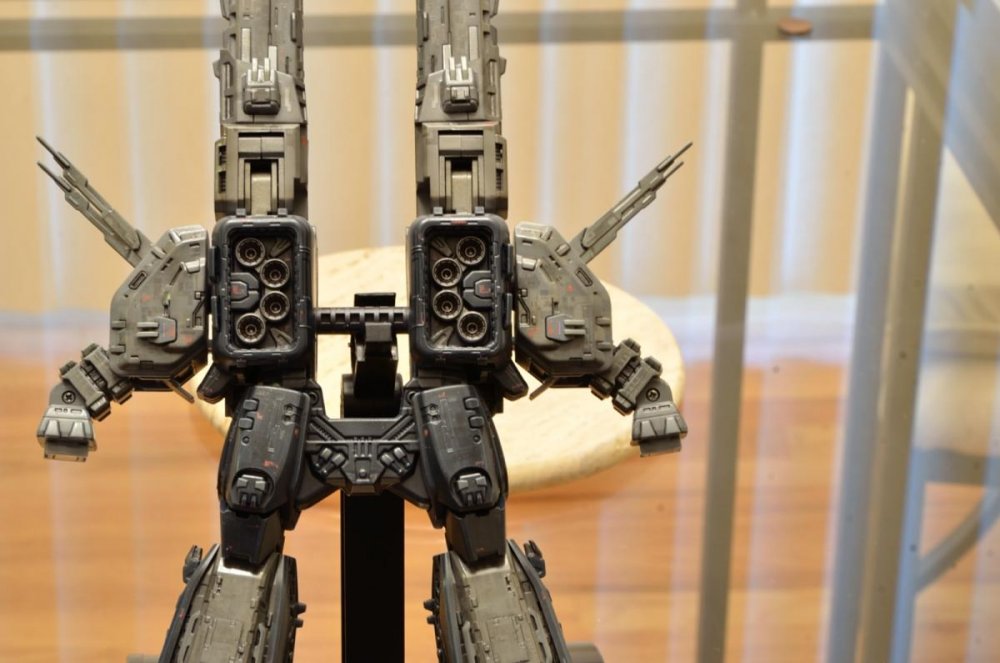
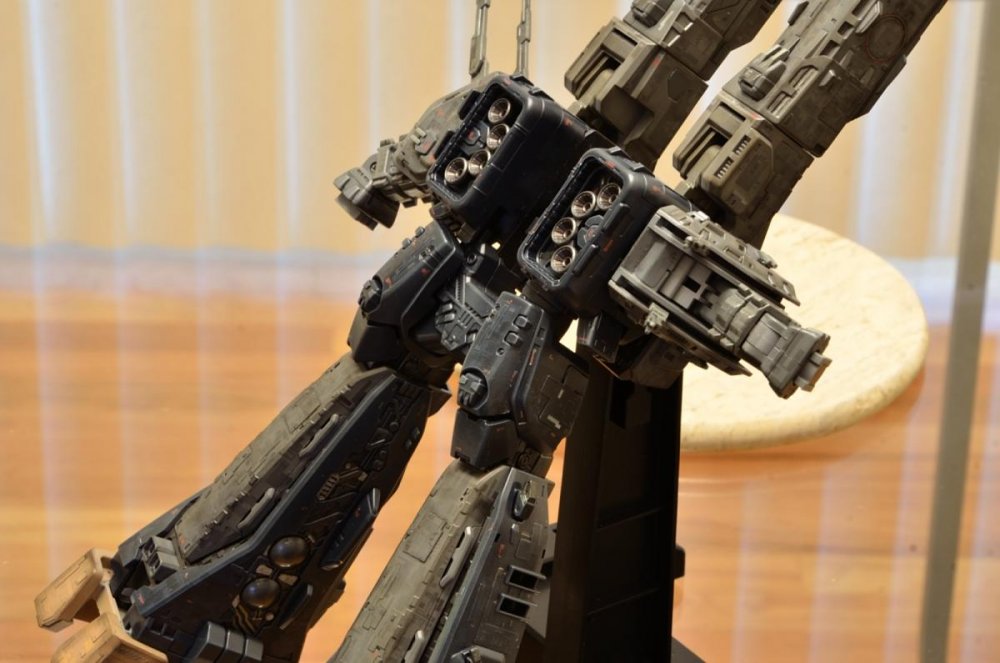
Over the past few days, I started adding weathering to large sections of my SDF-1. I used a combination of the Tamiya weathering kits and air brushing. The pics are a little out of date as I thought I put too much of my gray filter on the front of the legs which became too opaque and obscured most of the decals and made what was left really hard to see so I scrubbed it all off and started over on those sections. It looks much better now. The tamiya kits helped highlight and bring out the detail, especially in the blue areas. I'm glad I started out with really dark blue colors because the weathering already lightened it up quite a bit. What's left is finishing up weathering and detailing the ARMDs, painting and detailing the bridge section, then applying all those glow in the dark stickers. Lastly, I'll coat it with a flat coat and then put finishing touches like painting little dots of "lights" on the surface. I think I may scrap the idea of swapping around with the destroyed version of the cannons because I'm having a really hard time getting the covers off of the undamaged versions to remove them.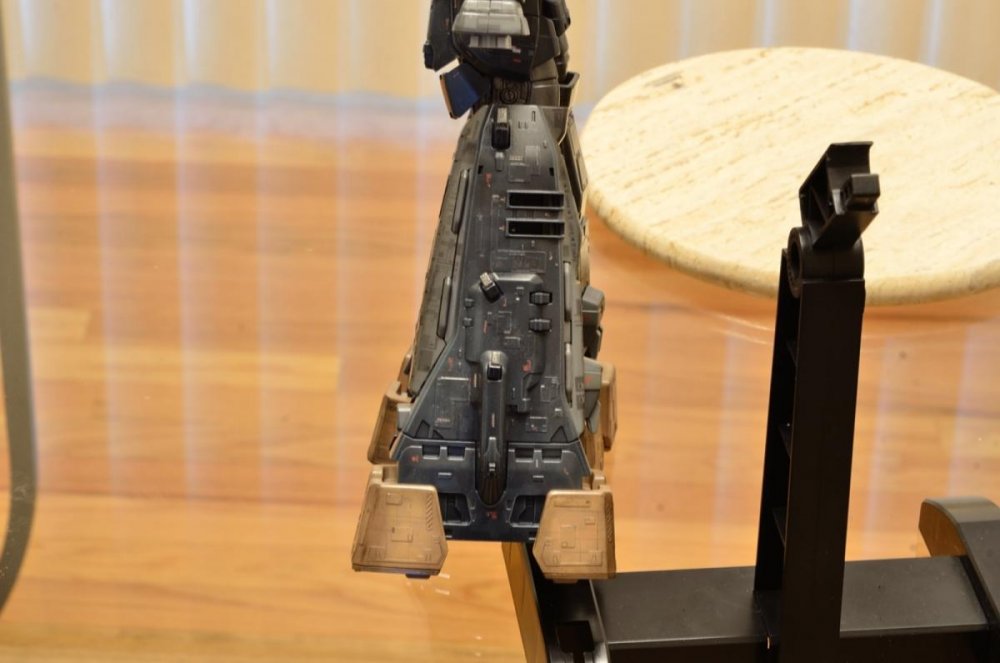

-
Yamato 1/3000 SDF-1 modification and paint up...
MacrossJunkie replied to wm cheng's topic in The Workshop!
Hehe, you probably don't want to emulate too closely. I usually feel like I'm experimenting every time I start a new project. Then I sort of end up "Maxwell Smart"-ing my way to completion with any perceived success feeling like a happy accident, or at least that how it seems to me Though I guess I learn things in the process which I then try to apply to the next project, but still... Yeah, the Tamiya weathering kits are pretty versatile. I discovered a while ago that when you do weathering over the panel lines with the brush end of the applicator, the powder actually fills into the panel lines too as you brush over it. On my 25G, for example, I used a fine tip black gundam marker to panel line solely the blue areas. It didn't look too good like that by itself, but I didn't care because once I started using the "snow" powder from the "B" kit, it started filling into the panel lines and lightened the heavy blackness of the lines in addition to adding a bit of fade to the edges of the panel line grooves. At the same time, that can be a double edged sword as there may be times you don't want it to fill into the panel lines which may cause extra work having to redo the panel lining afterwards. In those cases, it is probably better to save the panel lining as a later step. On another note, how do you attach the leg/booster sections of the PE valks (or the valk to the launch arm and launch arm to the ARMDs for that matter)? I haven't the slightest notion how it's supposed to be done and the diagram in the assembly manual doesn't help in the slightest... -
Mine was like that as well. The right forearm will click, although still flops up and down but at least doesn't slide back and forth. The left side had no locking whatsoever. I tried so hard pulling on it to see if it would click that I ended up pulling the forearm right off. I took off the beam gun housing and examined the area where it connects to the elbow joint. It seems the little clips that were meant to lock the arm in place were either molded improperly or bent from the factory. I re-attached the arm and then pushed the plastic clips from the outside with a screwdriver to bend the plastic inward, then put the beam gun housing back on. That seemed to do the trick.
-
I don't think it would have mattered if you did remember AE. They were long ago sold out as well =(
-
You can just save yourself the headache and use a pencil (mechanical or normal pencil that you'll need to keep sharpening as you go) to do the panel lining. It's easy and quick and will look better than using a fine point gundam marker on this particular valk, imho. I tried with an oil wash and the panel lines are so shallow that the pigments would wipe right out of the panel lines along with the excess when I tried to do clean up. I ended up doing about 90% oil wash and the rest in pencil where the panel lines were nearly invisible or couldn't get the oil wash to stay no matter how many tries. It took me forever. On the grayish surface of the VF-4, the pencil doesn't look too bad. you'll still want to clear coat it though because it will rub right off.