MacrossJunkie
-
Posts
3260 -
Joined
-
Last visited
Content Type
Profiles
Forums
Events
Gallery
Everything posted by MacrossJunkie
-

Arcadia 1/60 Perfect Transformation VF-0D for 2015
MacrossJunkie replied to Dark_Ghost's topic in Toys
Agreed. And yes, they were free floating and the bars were so thin that even if it were made of die cast for the toy, they would still be very susceptible to breakage. It just wouldn't be practical to duplicate on a toy.

-
Okay, so I need some opinions here. I retinted the canopy, but I can't decide if this purple is just about right or if it should be darker. Also, do you guys think I should leave the fold crystals blue or recolor them purple as well?
-
Master Made SD-style SDF-1 "Makuros" Add On Pack!
MacrossJunkie replied to evilcat005's topic in Toys
It would be nice if they included some little SD fighters in the pack. -
Heh, Looks like the rail cannons got put on backwards on one side. They're all facing the same way. I hope the shoulder plates can be loosened enough for people to correct it on their own should that happen to theirs. The other two samples look correct though.
-
Sometimes I resort to using a vacuum. The inner of the lightbox fabric seems to just constantly release little white particles. Personally, I don't think any of the add-on parts look good with the Prophecy. At least not with the orange, blue, and white paint scheme.
-
I am really tempted to buy one. It looks so good and it transforms too! I have to say it's amazingly detailed, comparable to the Yamato SDF-1 even. I could swear they used the Yamato 1/2000 or 1/3000 as reference. The shoulder rail cannons, for example, seem to be based off of Yamato's interpretation which looks different than the line art.
-
I really wish Arcadia would include waterslide decals instead of stickers or at least along with stickers. Even with trimming the stickers as much as I can manage, you can still see how it's higher than the surface, which never looks quite as good as if it were just printed on or going with decals. Agreed about the Yamarcadia valks having really shallow panel lines. Some of the panel lines on the 19 are so shallow, I can't tell if they are really there or if I'm just seeing things or I know they're supposed to be there but are completely invisible, like certain portions of the lines on the shoulder pauldrons. The Bandai VF-25's also have some shallow lines as well, particularly the back of the leg areas, but nowhere near as bad. I think one thing Bandai really needs to improve on are the exceedingly pathetic excuses for intake fans they do on all of the valks. To call them half assed would be a very generous description. I don't even know why they bother to make the intake covers removable if they aren't even going to put any effort at all in making the fans look anywhere close to decent. They put so much detail even into areas that would rarely be seen at all, and then they hire an 8 yr old to make a mold of the intake fans.
-
QFT. Black backgrounds are a pain to deal with. I only continue using them because I feel it provides better contrast in my photos. I am too. The lightbox I use seems to produce its own swarm of tiny white dust particles.
-
1/48+fp's, 1/60+fp's, 1/72, 1/2k, 1/3k,1/100 and now 1/144
MacrossJunkie replied to VF-18S Hornet's topic in Toys
More shots of fighter mode with the pod deployed. Does anyone else feel like getting the covers open is a literal pain? A lot of them are hard to open up and they end up digging into the space under the fingernails while getting them opened. -
Well crap. Missed it again...
-
1/48+fp's, 1/60+fp's, 1/72, 1/2k, 1/3k,1/100 and now 1/144
MacrossJunkie replied to VF-18S Hornet's topic in Toys
Lighting and angles seem to affect it drastically. That said, the lighter color could have been more pronounced. So although it's there and I can see it in person and in some of the photos, in others it's really hard to see so I took your feedback and made it more visible by respraying with less thinner so it shows up in the photos better. -
1/48+fp's, 1/60+fp's, 1/72, 1/2k, 1/3k,1/100 and now 1/144
MacrossJunkie replied to VF-18S Hornet's topic in Toys
I did. Look closer. It's harder to see in some shots due to the lightning. -
Every panel a different shade.
-
1/48+fp's, 1/60+fp's, 1/72, 1/2k, 1/3k,1/100 and now 1/144
MacrossJunkie replied to VF-18S Hornet's topic in Toys
Here are the rest of the pics I took of my YF-30. Finding the right mixture of paints for the subtle colors differences to paint the patterns on the wings and other areas was a pain. -
1/48+fp's, 1/60+fp's, 1/72, 1/2k, 1/3k,1/100 and now 1/144
MacrossJunkie replied to VF-18S Hornet's topic in Toys
Thanks, guys! Actually I did most of the work (masking and painting the pattern, oil wash, weathering, and clear coating) in a sort of GERWALK deployment so most of the surfaces would be exposed. I took the head and weapon pod off and did those separately. After that, I took it to battroid mode to finish off the parts that were still hidden. I should hopefully have time to photograph the other modes after I get home from work. -
1/48+fp's, 1/60+fp's, 1/72, 1/2k, 1/3k,1/100 and now 1/144
MacrossJunkie replied to VF-18S Hornet's topic in Toys
Thanks very much! I have been looking into getting an acrylic sheet for a while, but I'm having trouble finding what I need locally. I guess I could order it online, but it would probably somehow get to me all scratched and cracked with my luck. In other news, I just finished my first weathered valk since January this year. I took a long break and with so much stuff constantly coming in, I felt I needed to start making a dent in my backlog. I feel so rusty after so long. Here are the first pics of my YF-30. I'll be taking more tomorrow, particularly of the other modes. -
So while I was taking mine apart to repaint the canopy purple, I noticed that the gray on the LERX is a completely different color than the rest of the valk and looks so out of place. I don't know why I didn't notice that before. Is it supposed to be like that or is it just Bandai applying completely unnecessary paint?
-
I love hangar dioramas, especially ones with lighting. That looks really good. Wish I had the space to set one up myself. I'd end up staring at it for hours.
-
1/48+fp's, 1/60+fp's, 1/72, 1/2k, 1/3k,1/100 and now 1/144
MacrossJunkie replied to VF-18S Hornet's topic in Toys
Saburo, first of all, I love your pics. Secondly, I really want a surface like the one you use in your pics. The black velvety backdrop I use is such a major hassle and collects so much dust which takes a lot of effort to remove and wrinkles easily so I've been looking for an alternative for a while. Where did you get yours? I assume it's a black acrylic sheet or something? -
1/3000 Takatoku SDF-1 arms on 1/3000 Yamato SDF-1
MacrossJunkie replied to treatment's topic in Toys
Looking really good. Do you have any ballpark idea on what the price will be? -
1/48+fp's, 1/60+fp's, 1/72, 1/2k, 1/3k,1/100 and now 1/144
MacrossJunkie replied to VF-18S Hornet's topic in Toys
I like that you bothered to add additional decals to it. This is so ridiculous that it's awesome! That weathering looks great! I definitely want to see more shots of the stuff you have in your collection. -
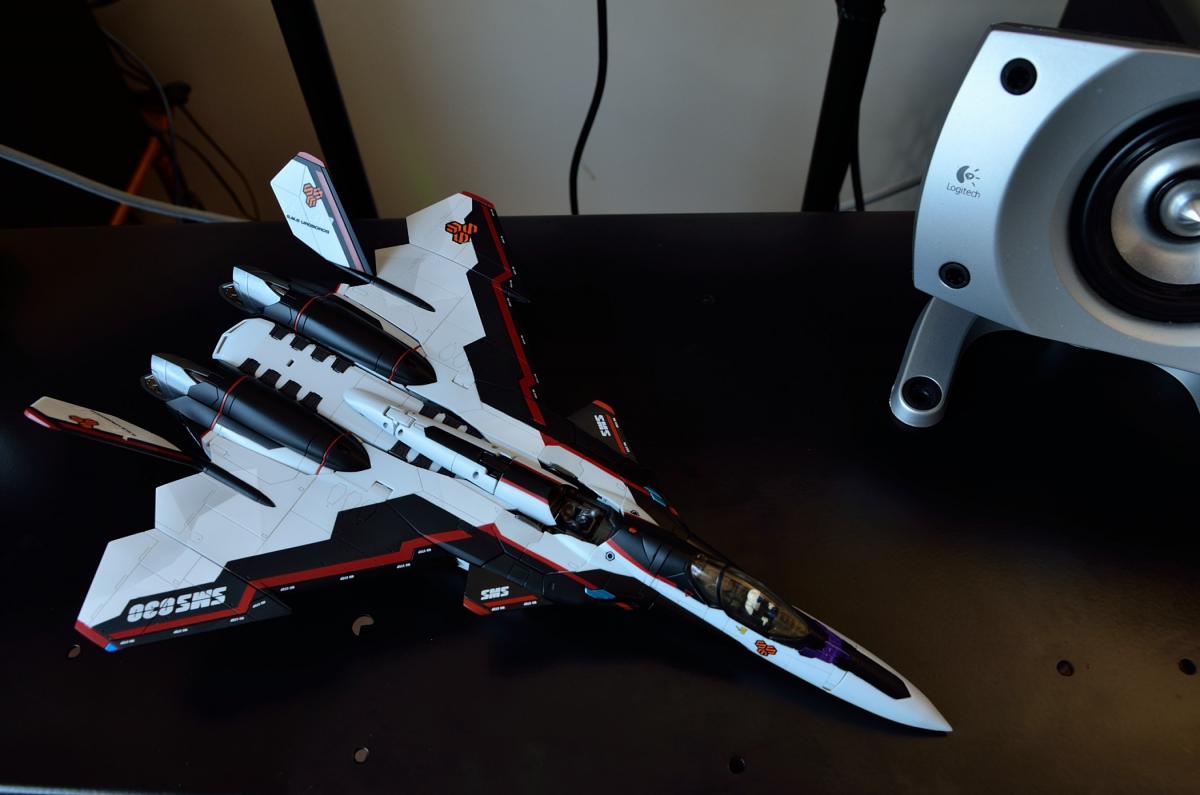
Beautiful! I had the same idea with making the leading edge of the black a lighter colour using a filter. I messed mine up pretty good though. In trying to find the right subtle shades for the patterns, I had to clean off paint and redo when the color looked off or too strong. However somehow the paint solvent I guess carried up the panel lines and capillaried their way up through the masking tape and spread out under the tape all throughout. So when I took the masking tape off, the red and black paint were all splotchy, cracked and ruined. This is the first time I've had this happen to me. I even made sure to press the tape on firmly, but the panel lines are pretty deep and the textured surface probably also allowed enough space for the paint solvent to work its way under the tape. So I had to mask off and repaint the black areas and the red stripes... what a friggin' nightmare. It especially sucked trying to fix the "SMS 030" and SMS logo areas. So it's been taking me far longer to do than I thought it would and has made me regret this project. Fortunately they went with a basic red and black so it was an exact color match with off the shelf hobby paints. Here's a quick snap of it on my desk. I went with 4 different color tones and tried to keep it subtle and simple. I initially tried to match the patterns from the red and grey variants, but it looked too busy in the end so I simplified the pattern. Stripes and the screw ups are mostly fixed now. It's still a work-in-progress. I still need to mask and spray the filter, do the weathering, and clear coat.

-
I'm super late to the party, but wow! That's such a classy looking stand design.
-
I like both. The 17 and 19 series of valks (for example) are both big and bulky and look great to me. On the other hand, the VF-25 also looks awesome in its own right. Not to mention its thinner design makes things like the full armor pack that stays on in all modes possible. If it was already bulky before the armor was added, the armor would make it too cumbersome. I actually feel like the 30 is partially a throwback to the older styles and more in line with the 11, at least as far as the legs are concerned. The leg design on it harkens back to the vf-1 or 11 with its simple, clean lines and shape. The upper body and back kibble are a different story though. I think the sleekness of the recent battroid designs is just a natural progression though. Valkyrie combat is all about speed and agility, so making it thinner and harder to hit while at the same time potentially reducing the mass of the base unit makes sense to me. Well, that's my take as far as Macross goes. I really couldn't say for other franchises.
-
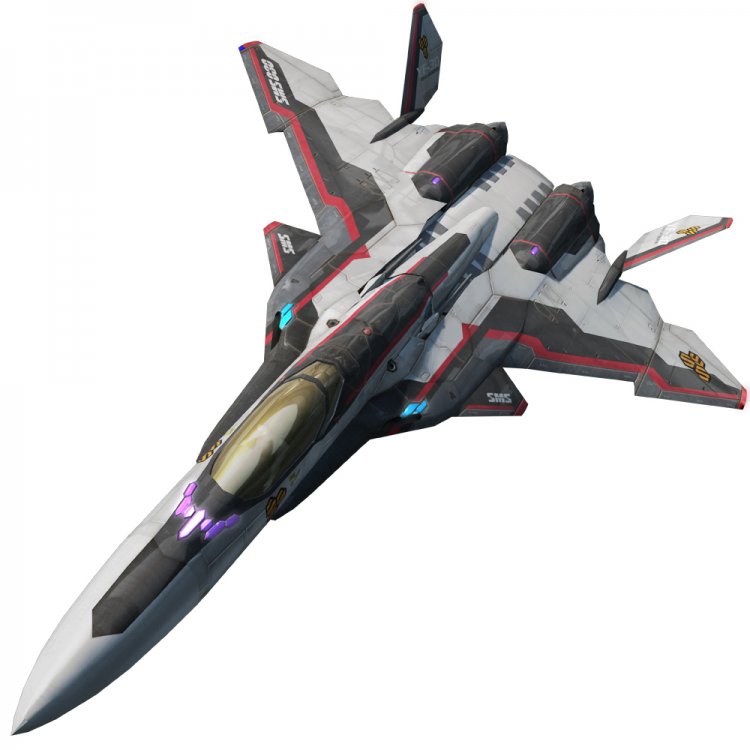
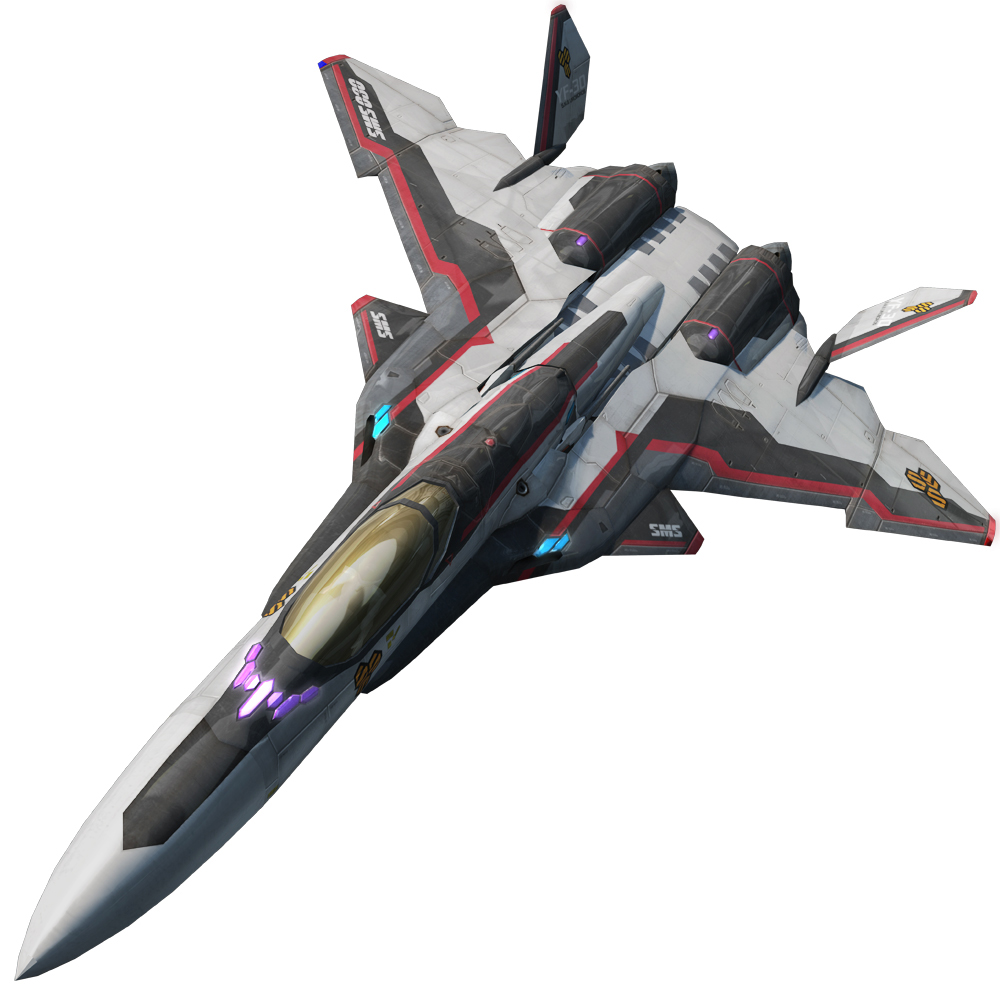
I've transformed mine back and forth a bunch of times over the past few days and thus far, haven't found any use for any of the braces. Mine has been holding very well in all modes. It definitely feels like it holds together better than the VF-171 in battroid at the very least. Hopefully it stays that way. My only gripes for it are: There ought to be some sort of tactile indication for when the vertical stabilizers are in the right spot in fighter mode The left wing on mine swings up higher and flatter than the right will go by a subtle but still noticeable degree. The missile pod doesn't really sit flush with the backplate and leaves kind of an ugly gap on the top of the fighter. On the plus side, I like how it shares some similarities with the YF-21. Like the very similar wings, how the hands are hidden in pockets, or being able to do the same "high speed mode" as the 21 by folding the wings down and moving the stabilizers inward. It's also nice having another Frontier era valk, aside from the VF-171, that doesn't have a nearly identical transformation as the 25. That satin finish looks great out of the box as well. I think I will use the renders of the 30 from the Macross 30 game as reference for the weathering. I noticed that the renders still have a subtle camo pattern that the red/black and black/purple schemes have but didn't translate over to the toy itself (not to be confused with the reflections). That's a shame. I may have to try adding that myself as I like that.