

MacrossJunkie
-
Posts
3260 -
Joined
-
Last visited
Content Type
Profiles
Forums
Events
Gallery
Everything posted by MacrossJunkie
-
I hope they give this another small run sometime in the future. I missed out on it the first time due to some expenses preventing me from being able to buy it on the initial release.
-

Bandai DX Chogokin YF-29 Durandal Valkyrie
MacrossJunkie replied to UN Spacy's topic in Hall Of The Super Topics
Has there been any mention of whether there is any sort of locking mechanism that keeps the crotch piece pointed out as implied by the pics or are they just cheating with that like a lot of people (including me) do? -
In my case, mine are stored in detolfs which currently have no lighting in the cases, my home office's blinds are always shut and the only sunlight that gets in is indirect light that leaks in between the blinds but none that shines directly on the cases. The times I checked were during winter and early spring when it was still cold and I keep the heat set at 60F (16C) in the house since I like the cold. So heat and sunlight are not really factors for me.
-
There was no damage to your X-Wing? I used Testor's Dullcote as well on the valk in my pic above, but you can see the obvious damage the tips did to it. I wonder why.
-
Yamato 1:3000 SDF-1 Macross - unpainted model kit
MacrossJunkie replied to CF18's topic in The Workshop!
I'd be up also for buying a PE sheet that someone doesn't plan on using. I hope those glow in the dark decals will be offered up at places like HLJ. I don't understand why they don't offer up all the extras like the sticker sheets and PE parts in a bundle. They're already making them, how hard could it possibly be to make extras and sell them to the people that bought their product early and at nearly double the price only just a relatively short time ago? -
Were they contacting plastic or touching painted surfaces? If you had any that were touching painted surfaces, could you specify a few toys and where they were touching? What sort of clear coat did you use on your X-Wing model? Just curious and I think it would be useful to know.
-
Bandai DX Chogokin YF-29 Durandal Valkyrie
MacrossJunkie replied to UN Spacy's topic in Hall Of The Super Topics
I thought the VF-27 fit together very well and the pieces locked in place very nicely. -
Unless you have been doing customizations or weathering to your valks or have one with weathering pre-applied like the low-vis VF-1A, it's doubtful you would run into this problem. The majority of most valks are bare plastic anyway. When I tried using the stands after washing the tips, I checked after two weeks and didn't really see any marring of the finish so I thought it was good. Then after some months, I had looked again while rearranging my cabinet and the stand was pretty much glued to the valk. So it's not a fast chemical reaction, but it does eventually happen. As I have hypothesized, I think it's just an issue with the silicone itself reacting to lacquer based paints. I haven't tried placing one of my valks coated with future to test it, but I really don't want to risk it. Plus I would have to give it a reasonable amount of time before checking, like another few months. If anyone else wants to give it a test or has already, I'd like to hear how the acrylics (or even enamel paints) fare. My guess is it should be okay, but don't hold me to it.
-
Meh. It wasn't like I soaked it in rubbing alcohol. I just did some wipes with it on a paper towel with a bit of rubbing alcohol. At worst, if it did any reaction, it was unnoticeable. It would have been of benefit if it actually did remove a layer. Afterwards, it was washed with liquid detergent in warm water and dried off. From googling around, I get the impression that silicone is reactive to lacquer based products, which would likely explain the melting clear coats. I'm guessing acrylic based paints and clear coats should be fine. I mean the stands are made of acrylic and there doesn't seem to be any reaction there.
-
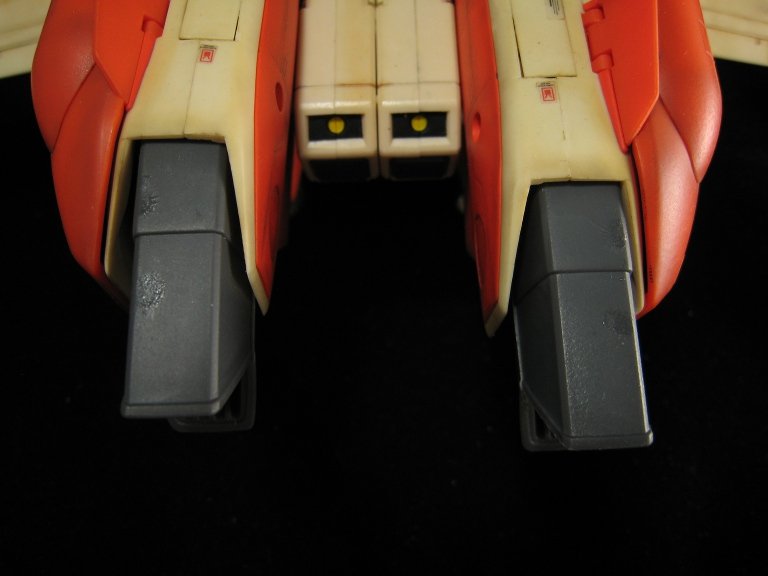
Just so people can see it's not an isolated incident. I had tried reusing the clear tip stand after Carlos has given the advice to wash the tips. So I had both thoroughly cleaned them with rubbing alcohol and used liquid dish washing detergent to remove any chemicals that might still be on the surface of the clear tips. Then I set my VT-1 back on it with the tips contacting new areas. The result after a couple months was that it still melted/at through the clear coat and turned it into a gooey substance. So it seems to be the material that the tips are made of that is causing this. You can see two different sets of marks: Two on the bottom of the left intake. Two on each foot. One set was from before cleaning. One was after. Cleaning them did jack. I got a Yamato stand and have since displayed it on that instead. The flexidisplay stands are still okay on bare plastic, they're just damaging on paints. This doesn't happen with the black tipped versions.
-
Yamato 1/60 VF-17 Nightmare Diamond Force
MacrossJunkie replied to charger69's topic in Hall Of The Super Topics
I think that S variant head looks so much better with the "jaw" piece colored the same as the main body. Looks good with the blue stripe instead of yellow too. -
If yours are looking up, it sounds like you don't have the upper cockpit section slid down far enough or at all.
-
Yamato 1/60 VF-17 Nightmare Diamond Force
MacrossJunkie replied to charger69's topic in Hall Of The Super Topics
This thing practically requires a stand. I don't see how a toy version of this would be able to stay up in GERWALK mode without at least some sort of support up in the front to prop it up. -
I hope HLJ will list those glow in the dark stickers as well. Now I'm just paranoid with painting up my SDF-1 further since I don't know what Yamato will or will not release or make available later. Those photo etch parts would still be nice to have. Kinda sucks that those of us who paid more are getting less without even being given the option of paying even more just to get the extras, if that makes any sense.
-
which Macross anime-series do you have the most toys now?
MacrossJunkie replied to treatment's topic in Toys
Counting the 1/48's as well, I would have to say that the largest category of toys I have are from DYRL. However, I have far more toys from the other series combined than I have from DYRL. As for favorites, it's a toss up between M+ for the YF-21, YF-19, and VF-11B and DYRL for the 1/3000 SDF-1. -
You should probably ask that in the model kit forum.
-
Yamato 1/60 VF-17 Nightmare Diamond Force
MacrossJunkie replied to charger69's topic in Hall Of The Super Topics
Because Yamato can't make the VF-171... yet. -
Pretty neat, but how do you tune this thing or attach replacement strings? I'm guessing the head of the guitar can open up or be removed?
-
Yamato 1/60 VF-17 Nightmare Diamond Force
MacrossJunkie replied to charger69's topic in Hall Of The Super Topics
If this sells well, I hope Bandai will finally consider making the VF-171. I like the VF-17 enough to get one, but I like the 171 design a whole lot more. Going by the CAD pic, it looks like they are going with the S version first. A shame since I like the D head and blue stripes more. -
How did this thread go from talking about the VF-11 to death worms?
-
Actually, wouldn't it be more like buying all the materials and items to build the house (lumber, concrete, bricks, wiring, etc) and just leaving it all on an empty lot in a big pile? Edit: nevermind, NB4M already said it before I refreshed the page and saw his response.
-
Bandai DX Chogokin YF-29 Durandal Valkyrie
MacrossJunkie replied to UN Spacy's topic in Hall Of The Super Topics
Ummm... how? It doesn't have anything on it that would allow it to do a vertical take off short of at least starting out in half GERWALK. -
Bandai DX Chogokin YF-29 Durandal Valkyrie
MacrossJunkie replied to UN Spacy's topic in Hall Of The Super Topics
Nice, they finally made it so the knife stows away in the tip of the shield. I'm relieved about the pilot. Seems like Bandai finally decided to go all out with this toy. It even seems to fix things that the VF-27 DX didn't address. Hopefully it won't turn into a floppy mess over time just from being displayed. I guess this would be the first VF that can do VTOL without leaving fighter mode (such as going to GERWALK)? -
Bandai DX Chogokin YF-29 Durandal Valkyrie
MacrossJunkie replied to UN Spacy's topic in Hall Of The Super Topics
Whatever the reason may be for the loosening joints it does happen. My guess is it might have something to do with the rubber pieces they have in the ball joint areas possibly drying out or degrading quickly within a short time. The ball joint and thigh areas are made entirely of metal (unless I'm misremembering) except for the hard rubber insert, but also exhibit this problem. My VF-25G stayed in battroid mode for months untouched since virtually the day I got it, stored away in my display cabinet. Then one day I decided to rearrange my display and transform the 25G to fighter mode, so I picked it up and the legs just flopped around loosely. My VF-25S sat in fighter mode for months untouched, then I transformed it to battroid mode and the legs were still very tight. I left it in battroid mode for another few months before I picked it up and noticed that the legs had gotten looser. I don't know if displaying them in battroid mode causes the looseness due to some sort of stress or compacting of the rubber piece, or if it just took longer for it to happen. My VF-27 that I have in battroid mode is not as tight as it used to be, but the legs are not floppy. I have not checked the other one that I leave in fighter mode. The ball joints for the shoulders that go into the metal block with the dots on them also turn loose for the DX's. I haven't tried checking inside to see if they have the rubber pieces inside, but my guess is they do. -
Bandai DX Chogokin YF-29 Durandal Valkyrie
MacrossJunkie replied to UN Spacy's topic in Hall Of The Super Topics
Ugh, that's even worse. They had the opportunity to make a decent pilot but stuck with the 1/72 scale blob pilot even after making a new cockpit. Regarding Bandai's bullet point list of improvements, I don't see how the fact that it's a "twin seater" is considered an improvement. That's just the design of the VF to begin with (or at least can be converted back and forth between 1 or two seats as demonstrated in the show for the VF-25 and YF-19 in M+). It would be like listing that the VF-27 has a bigger gun as an improvement over the VF-25 toy. Perhaps the bullet point item on the canopy in battroid is something about it being less exposed compared to the VF-25?

