Jung
-
Posts
381 -
Joined
-
Last visited
Content Type
Profiles
Forums
Events
Gallery
Everything posted by Jung
-
last

-
asdf

-
thing is really back heavy

-
ad

-
adf
-
sdf
-
asdf
-
asdf

-
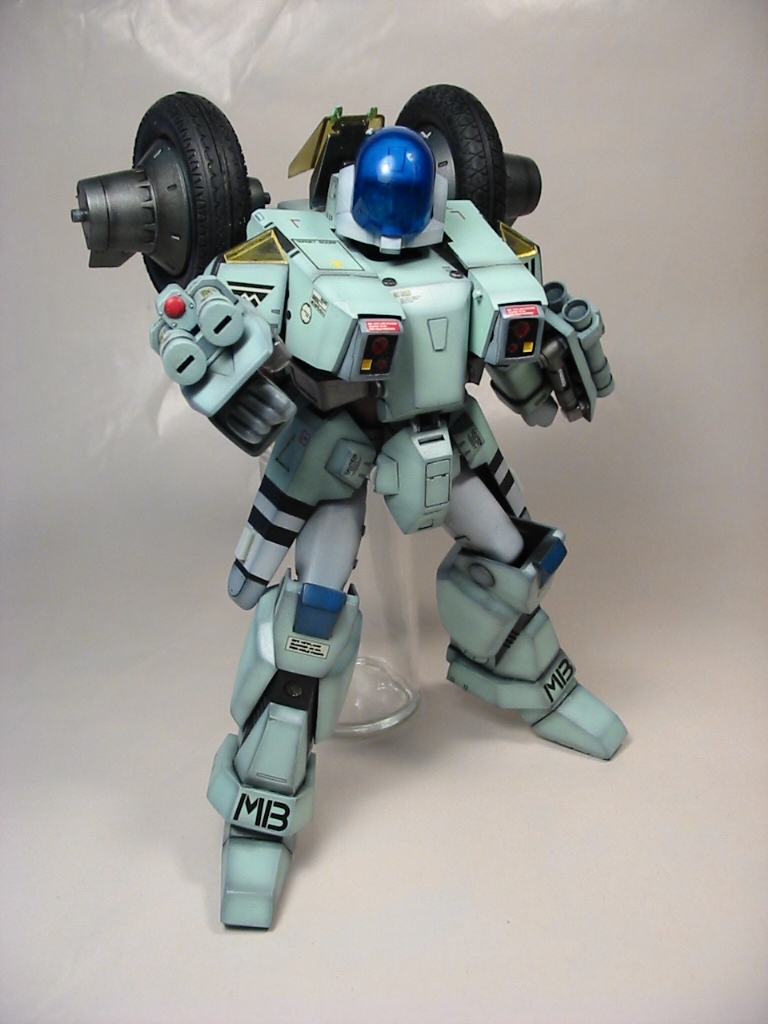
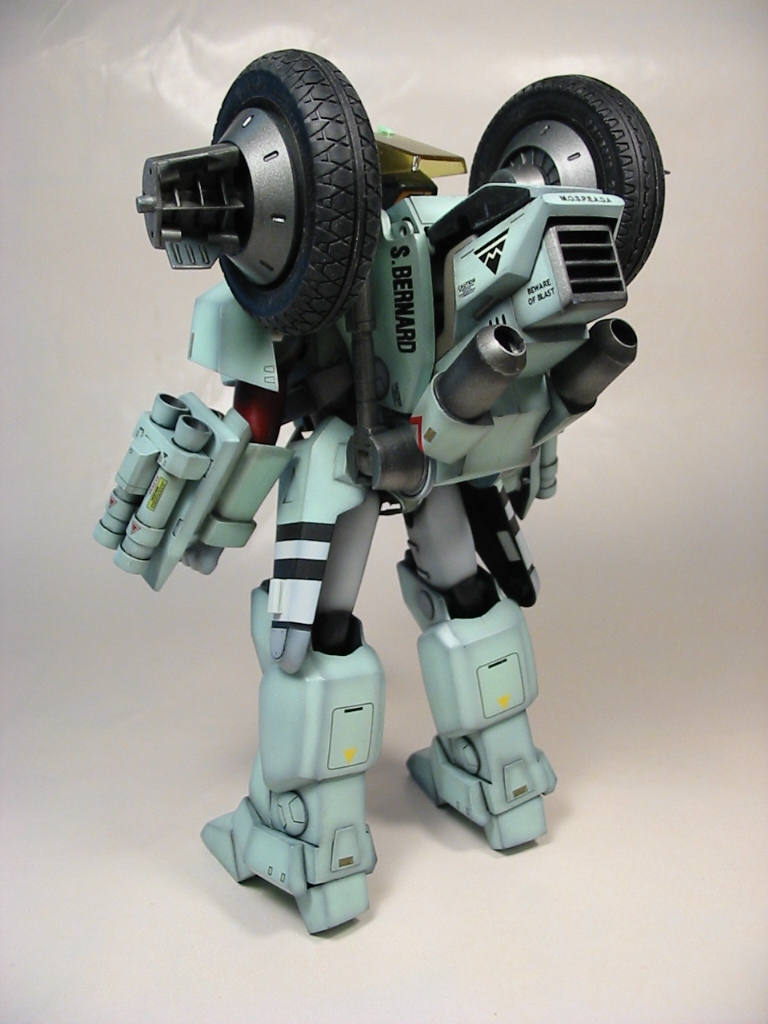
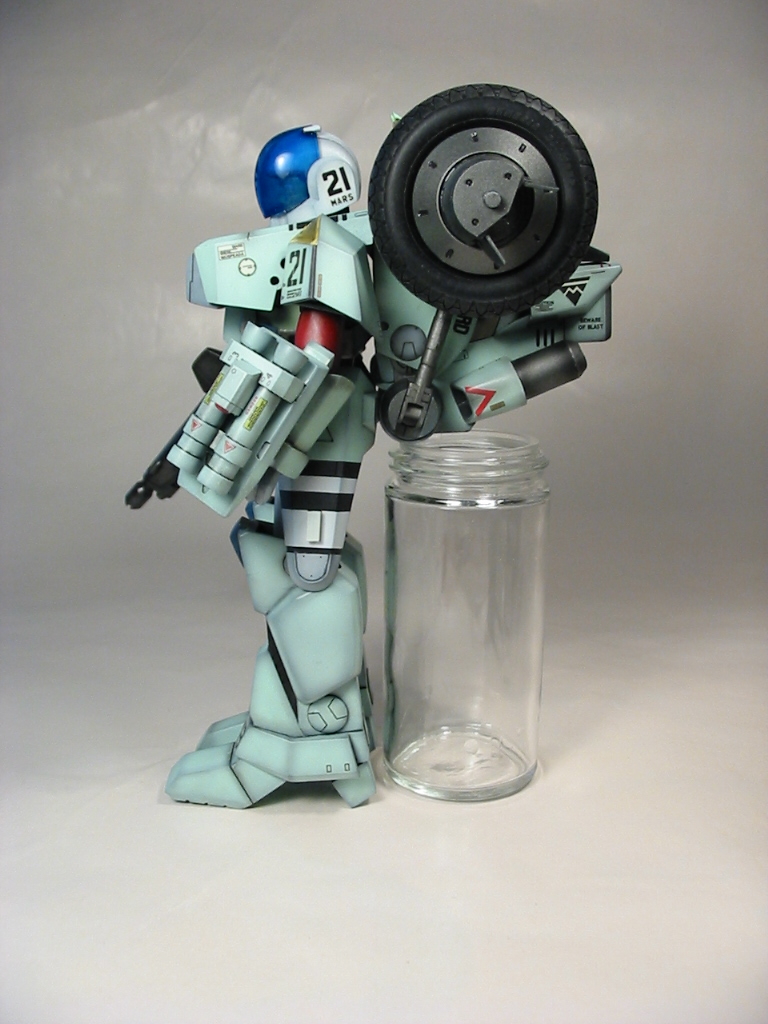
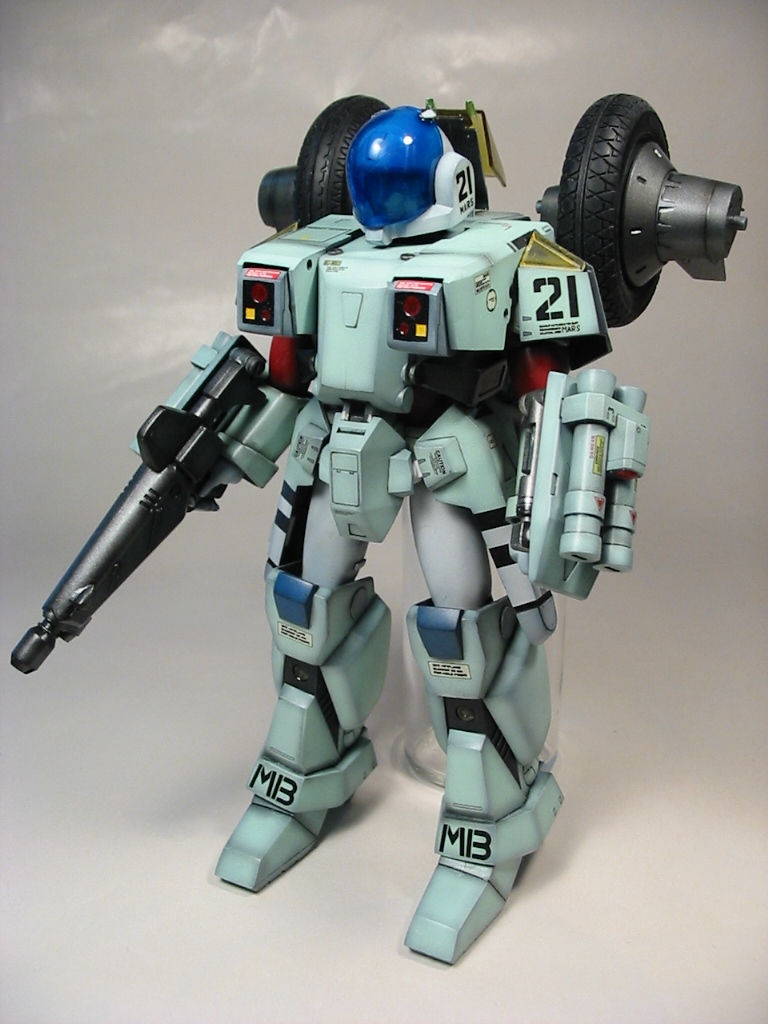
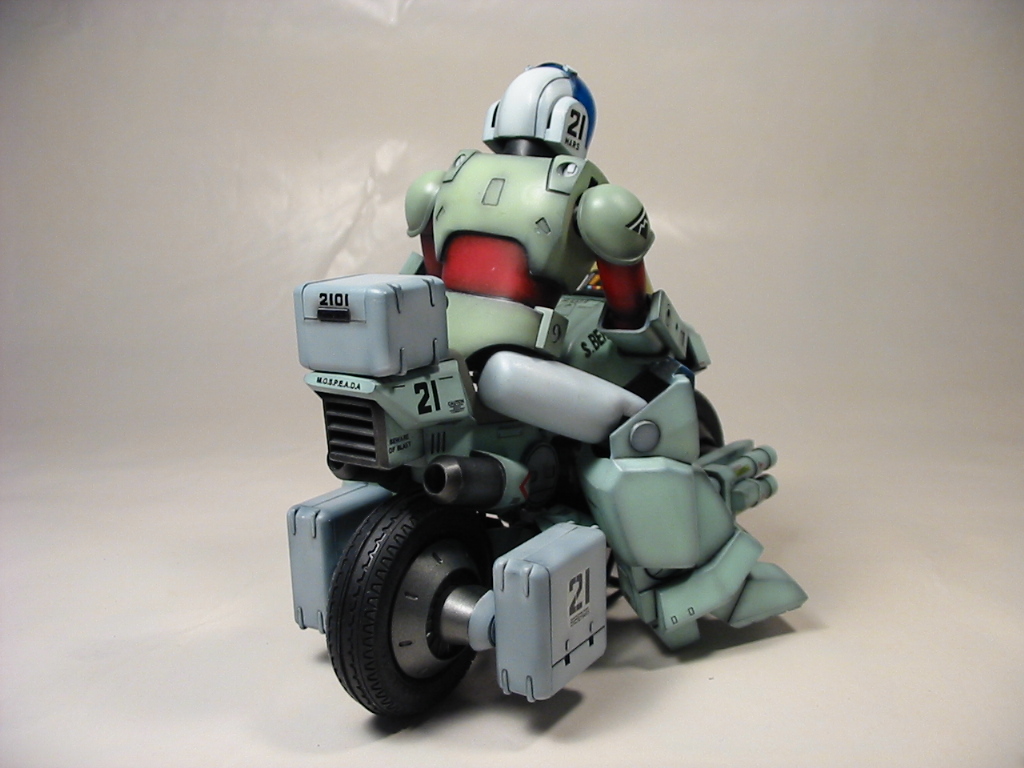
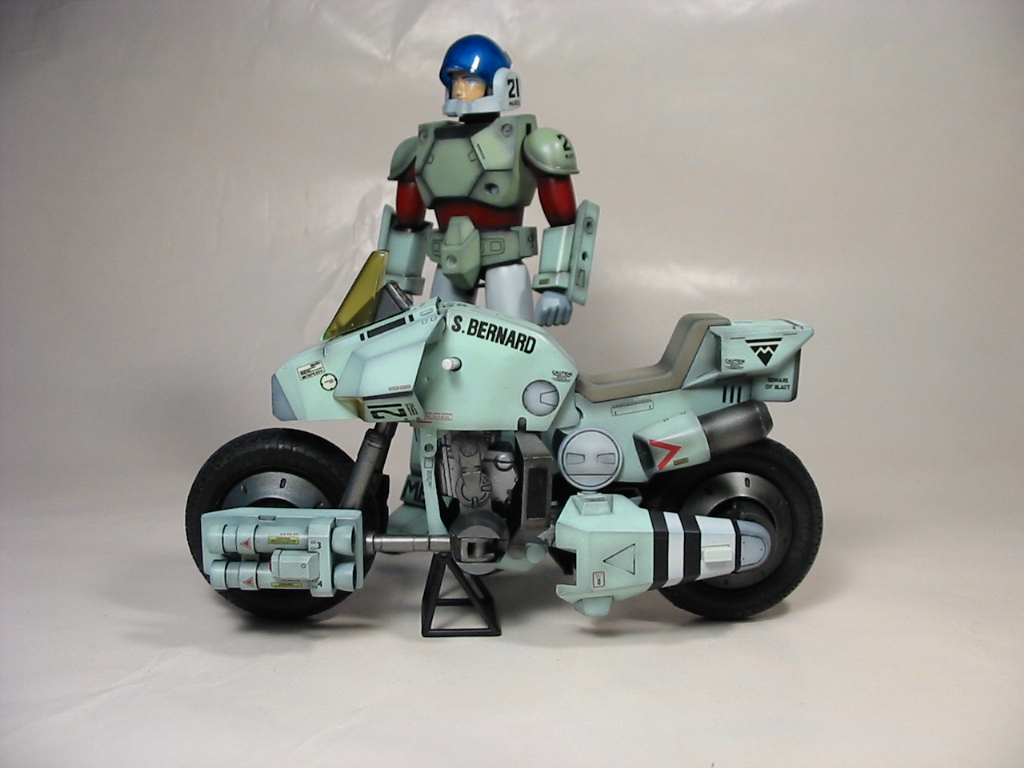
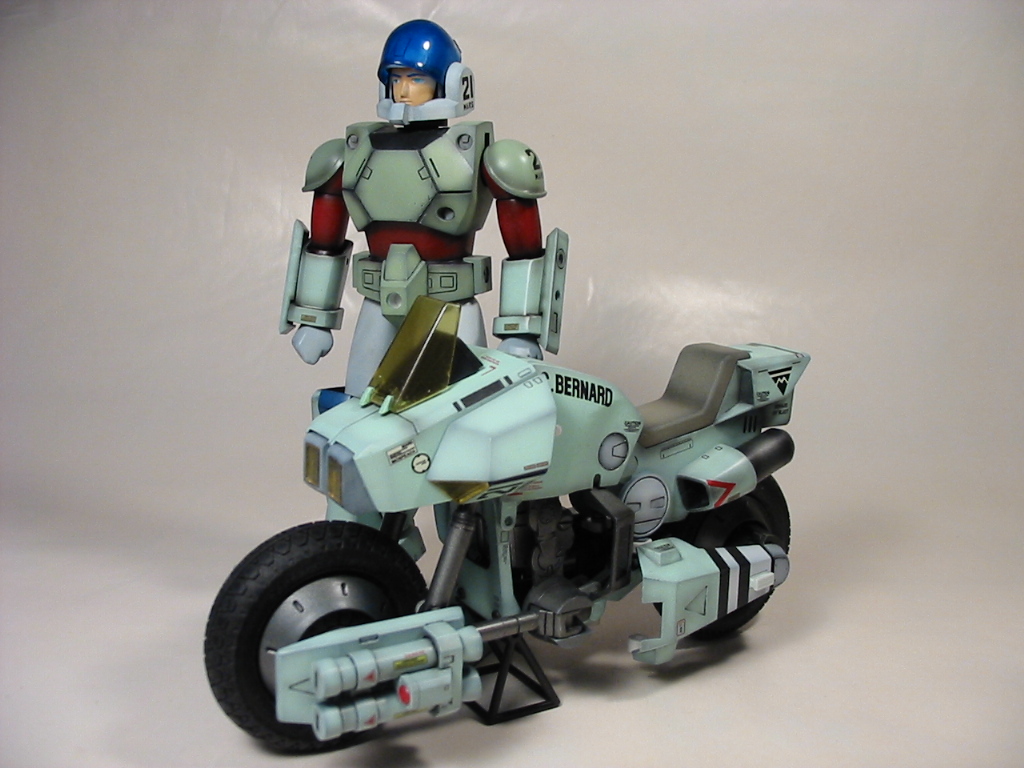
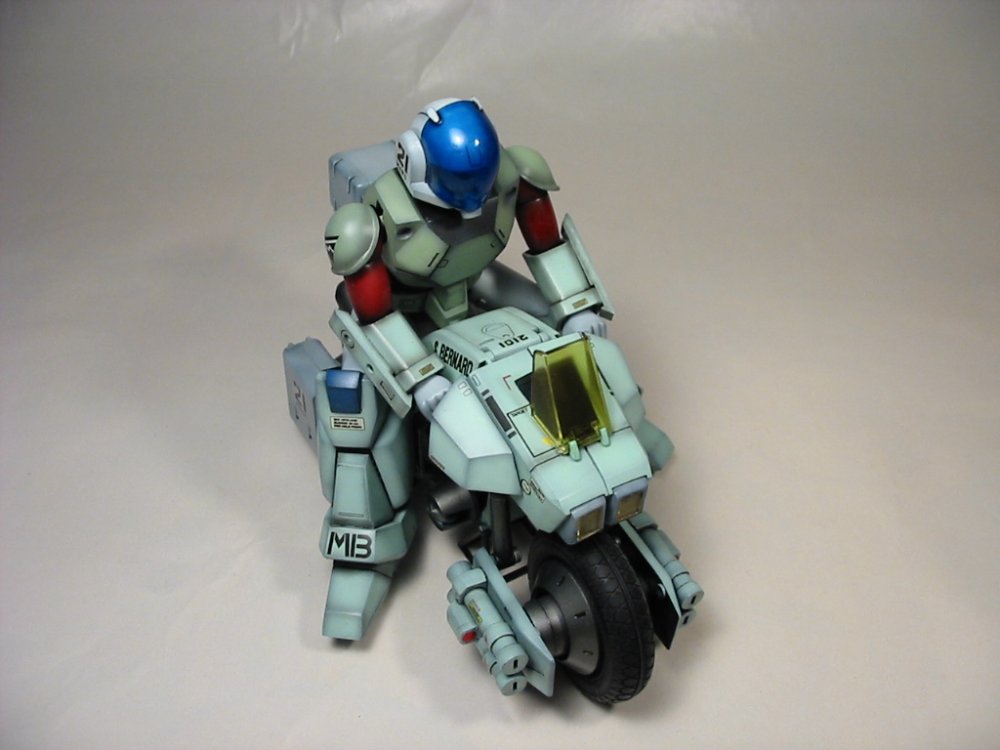
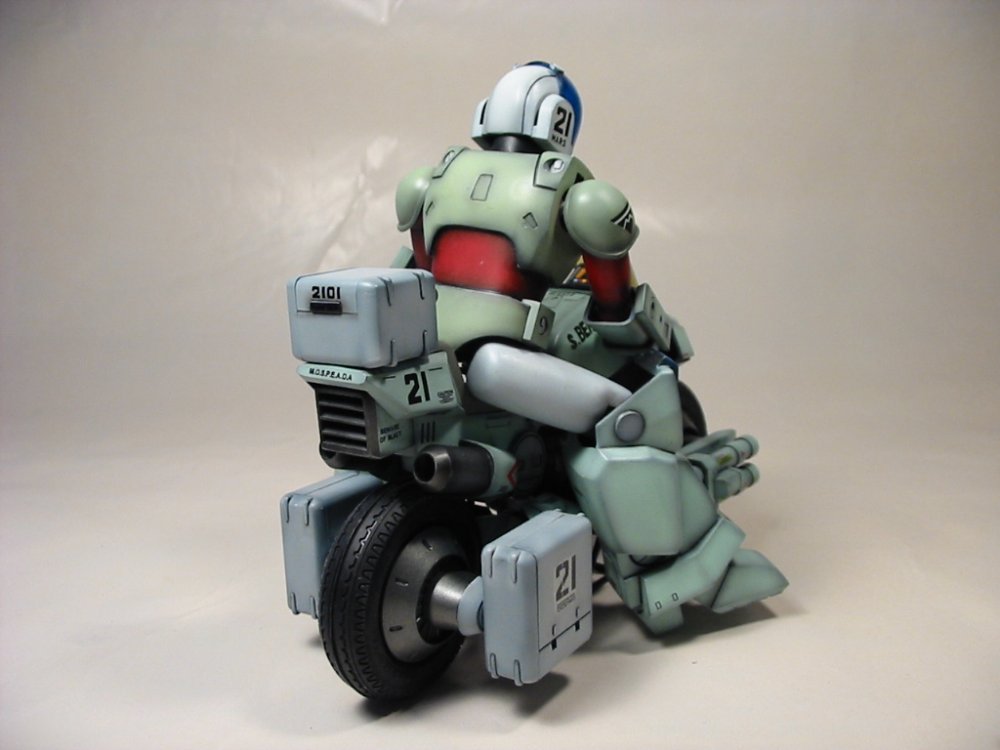
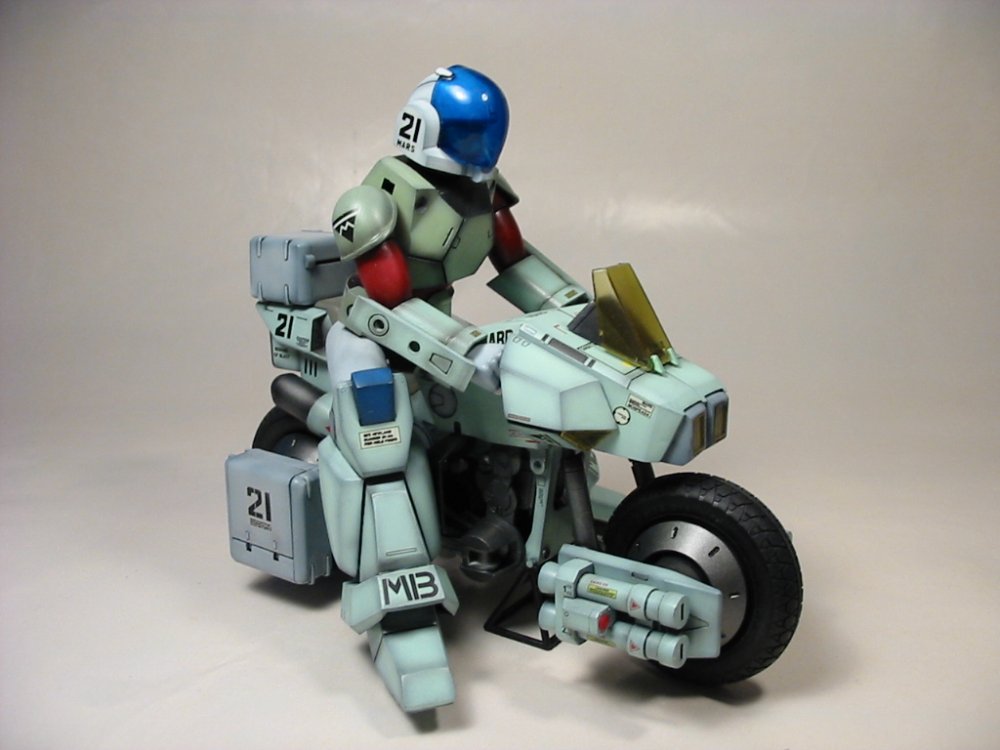
mods, if this is the wrong forum, feel free to move it to the appropriate one. 1/12 scale fully transformable cyclone by Imaii (RIP?). paints: 1)main colours are Gunze Sangyo Aqueous (water-based) acrylics -pale green for the bike -lime green for the chest 2)Tamiya acrylics -metallic grey for the cylinders, engine etc... -gunmetal for the rifle -flat flesh for the face 4)flat black, white, grey, khaki and apple red are enamels from hardware store spraycans sprayed into paint bottles for the airbrush. 5) clear parts were all FUTURE, used food colouring to get the different colours. First time trying it, works great(!), spent only $2 for a package of food colouring that included yellow, blue, green and red. To get the amber colour for the bike's front "visor" I mixed a few drops of yellow, and 1 drop each of red and blue. I used some of my old custom 1/55 decals, hence the "beware of blast" heh I still have the other 2 kits to build (rand and lancer), but no rook...

-
anyone who's interested could pm me
-
it's been sold a while ago, hehe
-
wow this thread still going no wonder I recieved a few pms about it today. Anyways to answer the paints I used. The brown colour is Khaki, but because the base coat was flat black, it created a darker shade. The brand is a local hardware store spray can, I sprayed it into paint bottles for airbrushing. I recieved my armour a few days ago, I'm very impressed! Didn't have time to work on it yet, but I took a quick pic (excuse the poor quality, just used the flash).
-
That looks great Min, you should definitely add a set of fast packs
-
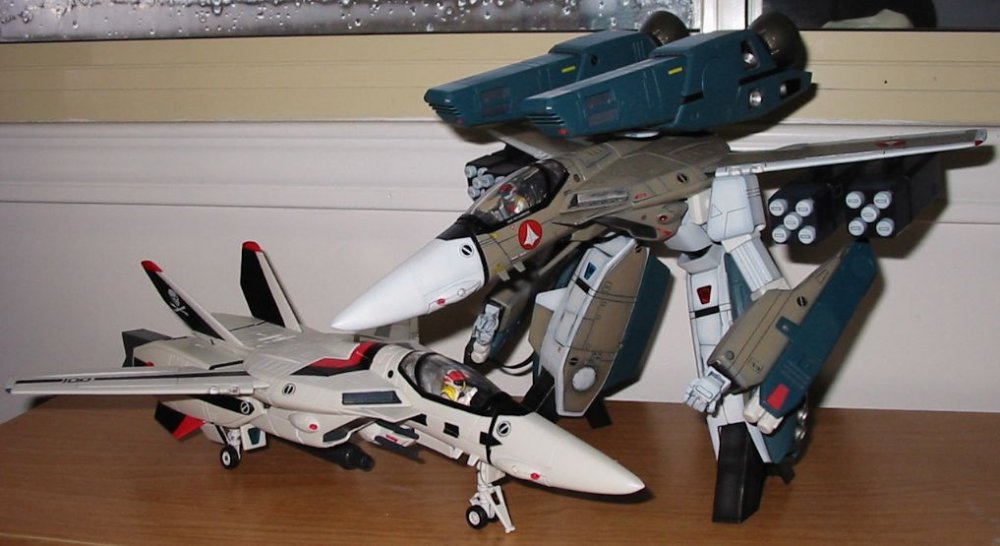
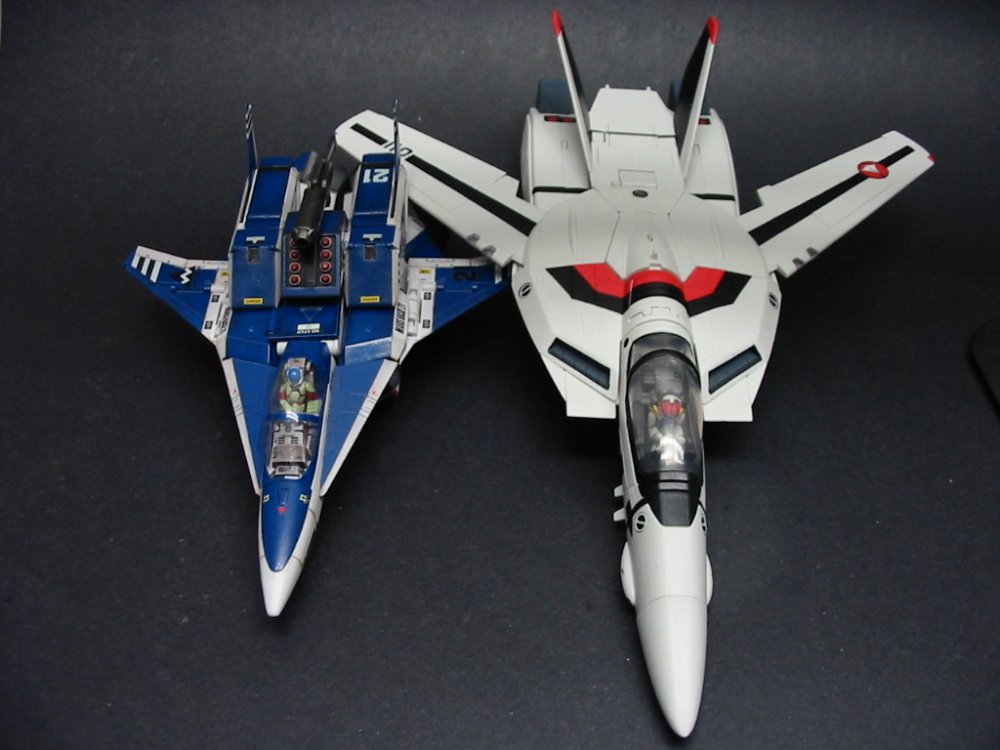
Is it me or it just dont look right on the shoulder missile. I've built the IMAI 1/48 transformable kit, and I think it's a great kit, lookwise and transformation. If toynami based their toy on the old imaii kit, they made it alot uglier. They changed the look of the shoulder "canon" and WHAT's UP WITH THE CLOWNSHOES?!?! Wow, and they are making this 1/55 scale? THat;'s gonna be really small! toynami disappoints me yet again! here's a pic of a side by side comparision of the 1/48 imai kit and the 1/48 yamato valkyrie. Although judging from the pilots, the imai kit is slightly smaller than 1/48, you can tell that the alphas are significantly smaller than valkyries, therefore 1/55 alpha is gonna be tiny!
-
the pics makes it clear, thanks for posting them. I wonder why they made that curve on the seat, I didn't have any problems fitting the pilot on my old hikaru vf1a. Personally I think that curve is too deep and quite ugly...
-
yeah I'm confused aswell...headrests? dimples? please elaborate, I don't care about velcros on boxes...
-
Hello Christopher, Hope things are well with you and your family. That is a beautiful 1/48 ultimate blue roses you have there! I also saw the pics at the mwcon 03 thread, that is also an incredible diorama! the blue and desert camo makes a great pair, don't they? I might attempt those. Any pics of them without armour? If not I'll just have to improvise. The 3 tone digital camo is gonna be quite a bit of work, I don't think they sell hexagonal masking stickers, so I'll probalby have to cut my own out
-
same method, sprayed the entire missile flat black, paint it white, solid white at the center of the pieces, than work outwards, fading as you work towards the egdes/panels, in this case the groves of the missiles. Than sprayed Future clear acrylic coat, than a black enamel wash, than a semi gloss laquer finish to seal everything.
-
fast packs on their way!
-
cool, anymore pics of the digital camo ones, I think there's a brown/desert camo one aswell.
-
wow thanks william, I'm a huge fan of your work the paint is holding up great, the enamels are pretty tough themselves, so it doesn't scratch easily. You'll really have to dig your nails into the paint ot scratch it. However of course, the areas where pieces rub against each other the paint will chip off. Before my first rebuild, I primed the entire piece, after I rebuilt it, I was really rough in transforming the thing. This showed where the major problem areas are. The knee cap like I mentioned before was the biggest area, had to sad that down significantly, also a bit from the tip of the lower/big leg piece that the knee cap rubs against. Important, don't sand the ring area of the knee cap piece, this keeps the knee caps stiff. When bending the knees, always lead with the knee caps, ie if you want to bend the knees forward for gerwalk, position the knee cap first than bend the knees. The other areas were minor, the back piece that houses the wings, just sand down a bit the areas that the wings slide along. The wing's are a tab and hole joint, so they will maintain their stiff rotation without worries. All the locking areas (ex. the leg locking the back pack/tail fins), you will experience minor specks of paint chipping off on the tabs. Protective coat I used future and model master semi gloss laquer. For the decals I just used the stickers provided. I did trim them very close however so they aren't that noticeable. The CF isn't very heavy on decals so I didn't bother with waterslides this time. Yeah chopped off the arms glued them back and than puttied the gaps. For the right arm (flight stick) I actually chopped off the elbow aswell. I wanted a more forward leaning position, rather than the 90degree bend originally. Notice the shoulder "pads", that's a plastic decals from an older takatoys decal set (originally for his custom 1/55 nose cone). It fit perfectly, just a bit longer, so I had to trim it off a bit. I used superglue for adhesive though, had to get a stronger more permanent seal due to the curviture of the shoulder pads. I think the decals makes it look like how it's susposed to look, as opposed to if I had painted it.
-
I need reference pics for my next custom, please post or point me to any pics of the various blue roses schemes. thanks
-
-popped off the back of the hand -removed the thumb, and chopped off the tab -drilled a hole at the base of the thumb -inserted a steal rod -attached a small bead at the end of the rod (from my little niece's necklace building set.. , luckily the hole was the perfect size for the steal rod), your ball joint -added a small amout of putty on the inside of the back hand plate -wet the ball, and make a depression on the putty, this is the socket. -let the putty cure, than trim off excess. I than applied a small amount of super glue to the putty socket, I think this seals it and gives it a smoother surface. -put the hand back together
-
nope, no parts were broken. Although it's a very intricate toy and well engineered, it's still a toy. Far less complicated than a perfect grade gundam kit, so it was relatively easy to take apart and put back together. The good thing was that almost all the pieces had Left or Right labelled on them...
-
yeah that's how you do it, just spray the panel lines and the area around it aswell as the edges with flat black. You could also just spray the entire piece black, that's what I did, because it made the brown (khaki actually) darker which I wanted. When you spray the main colour, spray the middle of the piece and than work your way outwards towards the panel line/edges. Higher concentration of paint at the center and fading out as you work towards the panels/edges.