-
Posts
2061 -
Joined
-
Last visited
Content Type
Profiles
Forums
Events
Gallery
Everything posted by Anasazi37
-
They are officially done now. I printed out a set and they look really good. Gene commissioned the decals for a custom Kurt is making for him. I don't know about their general availability yet, but will keep everyone posted as I know more. Just a quick heads up to everyone: I'll most likely be taking orders for decal and sticker sets next week, so start thinking about what you want to purchase. The order window, as usual, will be one week.
-
Hmmm....well, it wouldn't be too difficult to design armor decals for the 1/55 MG, but I don't know how much interest there would be (besides yours, of course). I've only sold a handful of the 1/55 MG sets so far and that is a little disheartening considering how much work went into creating them. I'm not sure I can justify taking time away from my current lineup of custom valk orders and the Koenig Monster commission to work on a set like that right now. Maybe later this year if things slow down a bit....
-
Do you mean these decals? I just put the finishing touches on them today. I'll be printing out a set in a few minutes.
-
Well, actually, the front parts of the boosters do match the white of the leg armor, but I do agree that they stand out. I didn't like the MG 2 when Hasegawa first released it, but between working on this custom and creating 1/48 decals for the MG 2 (one of Kurt's next customs for the Bling Bling King), it has grown on me quite a bit....
-
Armored Battroid
-
Armored Gerwalk
-
Armored Fighter
-
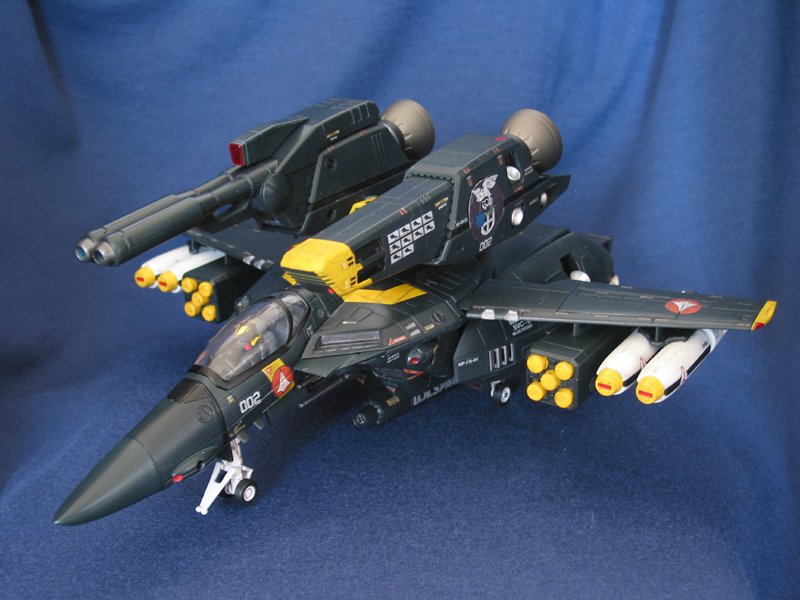
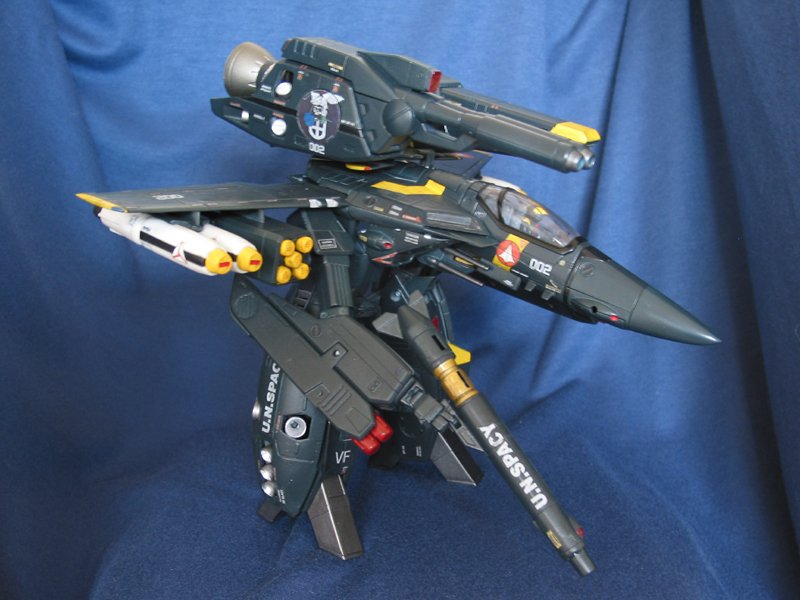
This custom was commissioned by xstoys. He asked for something pretty unique. He wanted: - A Version 1 Minmay Guard valk with Version 2 armor coloring - Version 1 detailing on the armor and weapons (like the MG Strike I did for min) - Both Strike and Super capability I had a lot of fun making this one. I also didn't sleep much and drank way too much coffee in the process. The biggest challenge was aligning the tire tread pattern on the chestplate with that on the various FAST Pack parts. It turned out better than I thought it would. I'm posting A LOT of big pictures, so many apologies in advance to those of you on slow modem connections. Fighter
-
And that's only the 300 dpi version. I have it in 1200 dpi, too.
-
I've thought about it. They aren't hard to print, but you'd have to spray coat it yourself with a tough enamel clearcoat before putting it on your car. ALPS printing wasn't designed for outdoor use....
-
Oh, you wanted the *original* MG. Why didn't you say so? The Cartograf decal version isn't quite as nice as the one published in Model Graphix. This is a 300 dpi version that prints at 5 x 10 inches: FYI: High quality = 1200 dpi or above Print quality = 300 dpi Screen quality = 72 dpi
-
Looks like we sand down pretty much the same stuff, Jung. The few exceptions are that I sand down the hinge sections of the landing gear doors for the legs so they don't scrape, I sand the chestplate and backplate pieces you leave unpainted just enough so they don't scrape after painting, and I also thin down the swivel sections on the legs and arms just a little. I'll post pictures of what I'm talking about later this weekend as I start work on a custom for xstoys. You can leave the DYRL-style hands on a custom 1/48 during transformation if you're careful, but removing them is never a bad idea.
-
I have one scanned in at 1200 dpi that is 300% larger than the original. It's print size is 3.5" x 9", but the file size is 126 MB. Way too big to post or email to you. it does make for a nice sticker, though. I just put one on my car.
-
If you're thinking about using all of the decals on the Hasegawa sheet, including the large red and blue ones, it won't work. 1/60 valks are larger and different in proportion. It took me a long time to design these decals to properly fit a 1/60: Here's how they look on the finished custom:
-
Yes. Send me a PM with the sets you need and we'll go from there.
-

Question about clearcoating Anasazi's decals
Anasazi37 replied to DARTHTODD's topic in The Workshop!
That's right--you had one of my really early sets before I figured out what protective coating works best. My decals don't suffer from that nasty cracking and peeling anymore. You can get away with applying the decals to your valks without laying down a glossy clearcoat if you use Micro Set and Micro Sol in tandem. Heck, you should use them anyway but they really help the decals adhere to the bare plastic. As for a top coat, if you are going to handle your valks on a regular basis, I would suggest coating them because no decal (even professional ones) are designed to stand up to repeated handling. If you plan on leaving them displayed a shelf, then you won't necessarily need to coat them. If you have access to an airbrush, I'd recommend Future Floor Polish for the glossy base coat and Micro Flat for the top coat. If you need to go the spray can route, Krylon Crystal Clear is a good base coat and Krylon Satin is a good top coat. -
Wow, thanks for all of the positive comments guys! It's feedback like this that keeps me making decals, stickers, and customs in my limited free time. Sadly, the custom is already on its way to g3173. It's like letting go of a loved one....
-
I'm also working on 1/48 versions of the BR 004 and 006. Any reference pics you can send me would be greatly appreciated. Jung, mslz22, and I have been looking for good ones for some time now....
-
Good to know. I thought about taking a whack at them but you never know just how much super glue Yamato uses and it wasn't worth the risk. I'll defintitely give it a try on my next custom, though.
-
The UUM-7 box missles were a real headache to paint. After airbrushing the base coat of sky grey and the overcoat of sea blue, I had to use a very fine brush to hand paint the yellow and gunmetal sections of the missles. Talk about tight spaces.... I had to take it really slow to be as accurate as possible. I then weathered those sections and the decals with some charcoal pastel powder on a q-tip.
-
-


