-
Posts
2060 -
Joined
-
Last visited
Content Type
Profiles
Forums
Events
Gallery
Everything posted by Anasazi37
-
Just checked the Tamashii Nations site and the armor set is sold out. That was fast. Maybe Bandai will do a second run of the set, but this doesn't bode well for the amount of competition we're probably going to face for the combo set during PO Madness. I'm hoping for Roy-like availability after release, but who knows.
-
Yes. I purchased an item during their recent "we found some old stuff in our warehouse!" sale and had it sent to my Tenso address. Worked perfectly.
-
The normal pattern is that there is at least a week between a formal item announcement and the PO, During that waiting period, it shows up in the Macross section of the Tamashii Nations site as a full entry, not just as a teaser picture: https://tamashii.jp/item_character/macross_series/ The one major exception has been the TV Super Parts, where we only got about a day to prepare. I really hope Bandai doesn't do that again.
-
@Saburo's enabling pics led me to buy an Arcadia VF-0S...and then the Reactive Armor to go with it. Those pics are dangerous.
-
Arcadia: "If you thought the YF-19 Premium Finish was a wallet-buster, just wait until this one goes up for PO"
- 2024 replies
-
- macross zero ivanov
- sv-51
-
(and 1 more)
Tagged with:
-
And when Arcadia lists the price as "undecided," we should maybe worry about our wallets. A lot.
- 2024 replies
-
- macross zero ivanov
- sv-51
-
(and 1 more)
Tagged with:
-
SV-51 Nora displayed at the CafeReo Character Convention (scroll to the bottom of the page): https://hobby.dengeki.com/event/1230284/ Looks like an October release date.
-
Best guess right now is that more information about a PO will be provided on that date. With the exception of the Super Parts, where the TWE PO went live the next day, I think there's been at least a week between the formal announcement and the PO for everything in the DX line. I'm really hoping that's the case here, too, because I'm on business travel next week and I really don't want to be sitting in my hotel room at 3am, on crappy hotel WiFi, trying to snag one.
-
If they don't do a Full Set Pack, then I'll have to pass. I have one DX 1J and I don't want to display it in armor, as I already have three others displayed that way (HMR, Arcadia 1/60, Yamato 1/48) and I like how it looks in Fighter mode on the special stand. Given the current secondary market price for the 1J, which will surely go up if it's an armor-only release, I can't justify buying a second one just for this. I'm betting on Full Set Pack, though, because it follows the HMR release pattern, we've seen that Bandai is willing to do Full Sets at 1/60 with the recent YF-25 release, and making us fool around with head swapping or head attachments would be a departure for Bandai's Macross lines. Granted, they didn't do a Full Set for the VF-31S armor, so I guess I'm really just hoping to not get Bandai'd here.
-
Looks like we might actually be getting a grey goggle gift set, HMR-style. Nice. 22 Apr is a Thursday, so I'm wondering if they'll release info about it that day and then pre-orders start the next day, since those generally happen on Fridays. I also wonder how quickly sites like Mandarake are going to be flooded with 1Js or, at the very least, we'll see the price come down to something more reasonable.
-
I'm excited for the stands to be offered again at some point in the future. My wallet feels otherwise.
-
Nicely done
-
I look forward to seeing your VF-4A all dressed up!
- 1113 replies
-
- vf-4 lightning iii
- arcadia
-
(and 5 more)
Tagged with:
-
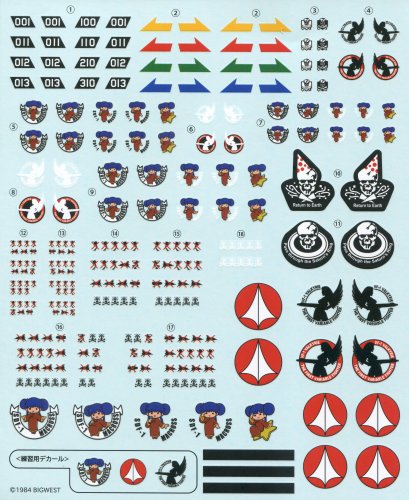
It's an actual decal sheet. And yes, I have it scanned. Below version is reduced to 600 ppi and saved as a JPEG to keep the size down.
-
I do have printable versions of both Wave decal sets. Scanned them a long time ago, at least 15 years, but recently redid the coloring so they print better. Still have the originals.
-
Since it's a web exclusive item, you'll have to keep an eye on the secondary market. Mandarake, Jungle, Yahoo Auctions Japan, and Amazon Japan are solid options. You might get lucky with Anime Export or MyKombini, too. You'll want to keep an eye on several sites right around the release date. You should also check out the For Sale section here, as MW members sometimes buy multiples and then sell their extras to fellow collectors who missed out on placing pre-orders.
-
There are times when something like that makes sense, but not for decals or box art. Why punch yourself in the head when you don't have to?
-
Agreed. Bandai likely wouldn't retool their packaging for new variants in an existing line. My wife says that she knows exactly when I'm taking valks out of their packaging. From another room in our house, she can hear the squeaks, pops, and cries of frustration as pieces fly everywhere.
- 20137 replies
-
- macross delta
- vf-31 siegfried
-
(and 4 more)
Tagged with:
-
I'm pretty sure that the VF-31 and SV-262 DX releases from Delta all come in styrofoam trays. I pulled out my VF-31S box and it's definitely styrofoam inside, and the other Delta boxes I really don't want to dig out are all the same form factor. Interesting that Bandai would use plastic for one series (SDFM/DYRL) and styrofoam for another (Delta). With that said, the armor for the VF-31S came in plastic trays, and that is the latest Delta release, so maybe they've switched over to plastic for everything. The VF-1J DX (first valk in that line) was released only six months before the VF-31E DX (most recent valk in that line). That could have been a crossover period in manufacturing. Guess we'll see when the next VF-31 is released in concert with the movie!
- 20137 replies
-
- macross delta
- vf-31 siegfried
-
(and 4 more)
Tagged with:
-
Depends on the nature of the distortion. The options available in Photoshop tend to be pretty limited, what I'll call "affine" because that is fairly common way to describe them. Essentially combinations of rotation, scale, and translation. That includes grabbing corners of an image and "stretching" them out to improve alignment. For flatbed scans, that's generally sufficient because of how the optics of the system work. A robust automated approach can nail that kind of task, but off-the-shelf graphics software generally doesn't excel in this area. The situation becomes way more complicated if you take actual pictures with a camera and want to stitch those together seamlessly. Goes from a two-dimensional problem to a three-dimensional one.
-
Decals are pretty resilient, so they should be usable even after 30+ years, but they can be fragile. I usually brush on a coat of Microscale Liquid Decal Film to protect the entire sheet, then start cutting out and using what I need. Sometimes the water-based adhesive has weakened a bit, so using a setting solution is a good idea.
-
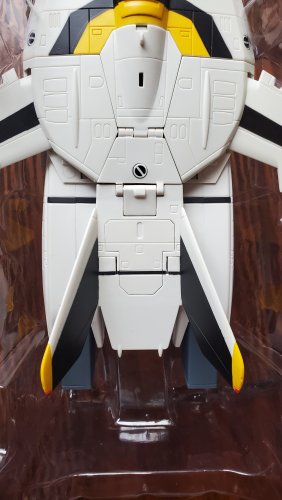
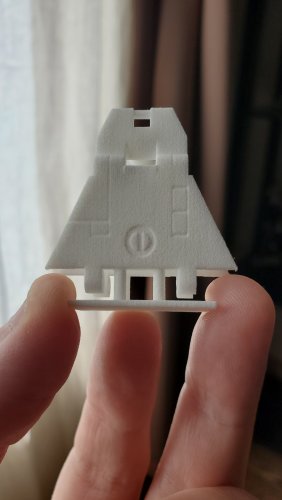
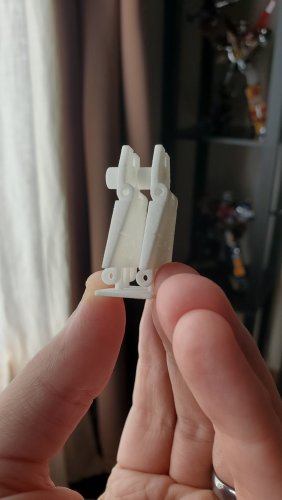
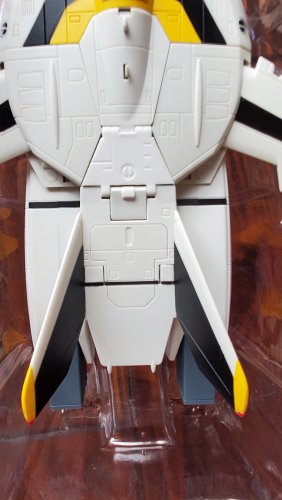
As I've been getting back into customizing valks, after many years of not doing that, I realized that I needed to fix a broken Yamato 1/48 VF-1S Roy before I could turn it into a Minmay Guard Paris Act. It broke where pretty much all of the Yamato 1/48's break: the infamous hinged part attached to the backpack, BP-8. I thought about just gluing the broken bits back together, but also wanted to look around online to see if anyone made a replacement, because a glued part will be a weaker part. Indeed someone did: https://www.shapeways.com/product/LGBVNSENS/ps-mac-001a-2-macross-robotech-bp-8-backpack-hing?optionId=123455663&li=shops I bought a two-pack, just to be safe. Surface texture is a little rough, but that's to be expected from a 3D-printed part. Some light sanding will take care of that. Otherwise, all I had to do was make the holes on the hinges a little larger to get the rods through them and the hole underneath a little larger so the screw went in all the way. Worked great! The plastic is strong enough to support transformation without breaking. The one thing I don't like is the vernier, which is at the wrong angle and is the inverse of what it should be. The central line through the circle is supposed to be at the same level as the surrounding surface, with the rest of the circle indented. This replacement part is the opposite. Not a big deal, though. I'll just fill it with some putty, sand that down, and then put a vernier decal on the same spot. That or use a Dremel to remove the raised sections and then put the original Yamato vernier in there. Maybe it's different so it doesn't look exactly like the original BP-8? Now to actually start working on the custom.... Would I recommend this replacement part for collectors who just want to fix a broken Yamato 1/48? Yes, if you're going to display it in Gerwalk or Battroid mode without armor, or any of the three modes with armor. In all of those cases, you won't see the part at all.
- 1 reply
-
- 3
-

-
Enjoy!
- 1113 replies
-
- vf-4 lightning iii
- arcadia
-
(and 5 more)
Tagged with:
-
Awesome! USPS estimated that most of the domestic orders would be arriving today, but I think some folks might be waiting another day or two if they're waaaaaaay out east.
- 1113 replies
-
- vf-4 lightning iii
- arcadia
-
(and 5 more)
Tagged with:

