
YAMATO 1/100 SCALE
VB-6 KÖENIG MONSTER REVIEW
INTRODUCTION
The German word for king is "Köenig" and the first impression is it's mythical size that I've seen in action from Sony PlayStation's "Macross Digital Mission VF-X2" released in 1999. Yamato had debunked that myth by giving us a product that fans have been wishing for. Prior releases of the "Köenig" were limited to the garage kit market and it's astronomical price point leaves nothing to be desired.
APPEARANCE
Bomber/Shuttle:
Going by the line art, I think that Yamato did a fine job in recreating Kawamori's creation. Whatever was conceptualized on paper isn't going to be mechanically feasible . So I may have a casual judgment on appearance.
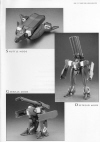
My first impression, It's an ugly valk or bomber. Personally, I think it has an A-10 warthog appeal to it that gives it a sense of realism. It looks appropriate for it's specific role as a bomber. The weight (or lack thereof) for a valk that's labeled a "monster" surprised me! Mostly constructed in ABS plastic. The only die cast that I see are the individual toes that comprises the vector nacelles in shuttle mode.
You can't miss the apparent gap between the wings and the main body. It doesn't bother me personally but some fans or any collector in general that has a discriminating eye may find it unappealing.
Located near the rear of the shuttle on it's upper half are two hidden compartments. Each side houses the missile launchers. Their ineffectiveness to be displayed in an open manner just gets you to thinking, "why even put this in here?" The extra effort into putting that detail in but not going as far as providing an option to display it, gives it unfinished quality.
Click
on thumbnails to enlarge |
||||
Gerwalk:
The gerwalk mode is like a mini monster from bow to stern. If the rail guns were posed in a crooked manner like mine were, the four rail guns can be detached from it's base so adjustments is possible. The extra detailing within the rail guns is a big plus. As finely detailed as the rail guns were, the same can't be said for the six rocket launchers located in the arms of the destroid. Simple depressed indentations and black paint is fine for a cheap toy, but not for one that has a $125 price tag.
The rocket launcher arms have a few weak points that may pose to be a problem after repeated transformations. Located at the upper front end of each rocket launcher are a pair of holes adjacent to each other. The hole, above, serves as a locking mechanism for a tab that receives it in shuttle mode located at the back of the cockpit (and from within the cargo bay like housing). The holes having a thin plastic structure that can be viewed against a light source, although I didn't need a light source to see it's translucency, I did see the flaw under normal lighting. So it may be prudent to exercise some caution here.
Some details like the 30mm anti-aircraft gun (which was prominently located at the bottom chest area in the line art) went thru a minimalist design compromise. It's a simple box with two tubular nozzles and the left tube being more pronounced. I don't care really about the Gatling gun like protrusion when you have a rail gun and rocket launchers at your disposal, but Yamato went as far to put that in there, despite it's less than accurate portrayal.
The legs were not very pleasing to look at. Especially, the knees because it leaves a lot of the exposed interior. At your discretion, you may use your own artistic license to improve on the look. See pics for more details. The cockpit compartment always seems to cave-in into the chest area while in this mode. This and the lackluster detail of the rocket launchers are the only gripe that I have.
Click
on thumbnails to enlarge |
||||
Battroid/Heavy Destroid:
Possibly my favorite of all modes. Although the pose-ability in the legs is limited, the destroid mode has a good balance due to it's hind legged stance.
The rail guns may prove to be a detriment because of it's top-heavy displacement. I should know because I had witnessed it tumble and survive a 2 feet drop, no big whoop!
There were some stress marks that had appeared during transformation, not due to the unfortunate tumble of which, luckily fell on carpet. The stress marks were first detected at the hinges of each individual toe. I noticed that most of the pivots and joints are all constructed in the same dark grey plastics.
I have from collectible experience believe that grey plastics tend to be brittle and can be more fragile over time. An example, the first release of Yamato's VF-11; any 1/60th scale Takatoku Orguss toy and also if you're McFarlane toy collector The Matrix APU robot all have been constructed in grey plastics and each toy have suffered stress points and breakage.
Perhaps it may have been solved during the span of time. The darker grey plastics in the Köenig may have been the final result to overcome that problem, but the McFarlane APU unit was also molded in a dark grey plastic and it just sat in my display case over time. Only to find out later that the left arm had completely been severed off. It had been burdened by it's own heavy weight. It may not have been constructed with the same plastics that Yamato employed but careful attention maybe required when handling it. My advice, take any precaution to avoid any man handling or perhaps leaving it in shuttle mode. Maybe the latter was too drastic.
Click
on thumbnails to enlarge |
||||
TRANSFORMATION
It comes out of the box in bomber mode but I must say it looks like an intimidating task to transform. The fear of breaking something off is always at the back of my mind and paying over a hundred US dollars would just add insult to injury but I digress.
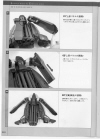
The illustrated manual guides you to a photographed sequence. It was fairly simple to convert the shuttle into Gerwalk but take note at the tabs that was mentioned beforehand and also take notice at the tabs located at the stern or back of the shuttle when removing the arms from their position.
When removing the arms from its position lift the arms from the rear of the shuttle. This will expose the interior housings for the rail guns and the two tabs that hold it in place. Once this is done, you will have to work the shoulders by pulling gently towards you to reveal another set of tabs located at the back of the cockpit. When you have successfully unlatched the arms from it's shuttle position, then you can proceed with the transformation sequence.
When the legs and arms have separated, it turned to be an unwieldy toy to transform, so it may also help to have a large surface area preferably a table to transform it.
There are 30 points of articulation in Gerwalk most of them in the legs and 42 points of articulation in Battroid/Destroid mode. The only ratcheted joints can be found in the shoulders.
Overall there was no difficulty in deciphering the photographed sequence in the manual.
DIMENSIONS
Shuttle mode:
Gerwalk mode:
Battroid/Destroid mode:
ACCESSORIES
Most of the stickers provided didn't show any specific placement on the Köenig. Just the eyes and the Macross kite logo were the only placements that were pointed out in the manual. Everything else was largely guess work.
Here are scans of the sticker sheet and selected pages from the instruction manual: -
Click
on thumbnails to enlarge |
||||
 |
 |
 |
||
DURABILTY
This review gives us a unlikely scenario because some time has passed since it's release date. I have 3 displayed in their respective modes and I'm finding out that the joints are a little loose on the gerwalk mode as well as the destroid.
The gerwalk mode has its shoulders and elbows flopping downward while the battroid/destroid mode arms are still stiff in movement. While the destroid mode didn't suffer in the arms it did however suffer in the hips and knees.
These modes were only displayed since it's purchase last year around February. The culprit, who I could point the blame at regarding the loose joints, was that toy's own weight.
The grey plastics of which I had some concern has no further stress marks. So maybe that advice by leaving it in shuttle mode may not have been drastic after all.
PAINT JOB
The toy was mostly molded in color and very little paint was applied to it. No over-spray from any of the vector nozzles painted in metallic silver were found. The black detailing, for the most part, has also been applied carefully. However the bright orange paint on the intakes of each thrusters had some minimal paint running beyond the mold lines; some green plastic bleed thru in the orange paint and some under spray can be seen inside the intakes.
There were a few sprue cuts that were noticeable in the the arms, vertical fins, bottom bridge of the base behind the rail guns etc. The expected mold lines were not as visible.
FEATURES
First variable VB-6 Köenig in toy production.
Click
on thumbnails to enlarge |
|||
Close
Up Pictures |
|||
BOX
The box art is generic as we have come to expect from Yamato. It's ugly font selection of "Brushscript" over laid on top of "Photoshopped" filters will have a place behind closed doors and away from disgusted glances. It has a flap lid box style that features a window with a less than dramatic background choice. The graphics under the lid shows the different modes of the monster and more poor font selections has made the menacing monster into a doobie smoking hippie. Where the hell do they get their graphic artists from? Whoever did their packaging art for Votoms needs to be hired back!
Click
on thumbnails to enlarge |
|||
PROBLEMS
In my initial thoughts from the first time handling this toy, the grey plastics were the major concern. Now that a year has past those concerns have waived off but new problems have resulted, namely the loose joints. The only solution would have been a design feature with ratcheted joints but it may have been a design issue that prevented ratcheted joints to be present in the areas of my concern. I guess the only remedy is by transforming it occasionally into shuttle mode or tightening the screws if it's available for you to adjust.
COMPARISONS & GROUP SHOTS
Size comparison photos with Yamato 1/12 scale ATM-09 Scopedog toy and Yamato 1/48 scale Hikaru VF-1S Strike Valkyrie.
Click
on thumbnails to enlarge |
|||
Yamato
1/12 scale ATM-09 Scopedog |
Yamato
1/48 scale Hikaru VF-1S Strike Valkyrie. |
||
Group photos with together Takatoku 1/100 scale Destroid Conversion Kit (Destroids Tomahawk, Defender & Phalanx) and Bandai 1/100 scale VF-1A Hikaru.
Click
on thumbnails to enlarge |
|||
CONCLUSION
The first of it's kind to be made, 'nuff said! Not to mention, the ambitious endeavor that Yamato has taken steps to release this as a viable product is beyond my imagination. Although simplistic in detail, the toy is an engineering marvel despite it's minor problems which can easily be overlooked. This has set the bar even higher for Yamato to achieve.
...AND ONE MORE THING
Thanks to Graham for allowing me to review this and I have a new found respect for toy reviewers everywhere!
-Eric